Lesson of the Day 95: Sandpaper Letters — The Multi-Sensory Bridge from Sound to Symbol
Published on: July 07, 2007
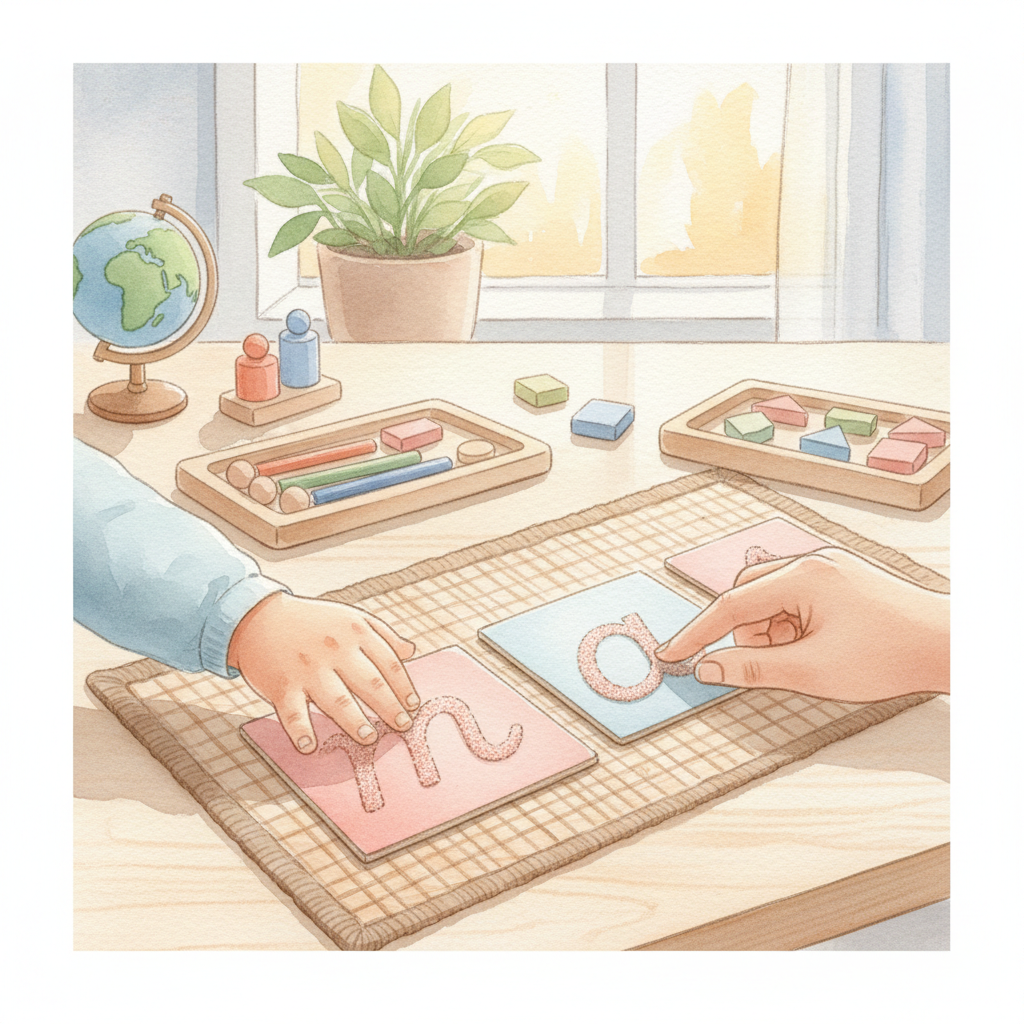
"The child who has traced and touched the sandpaper letters, when she takes up the pen to write, is already initiated. She has already begun to master the movements necessary for writing, and what she produces is not the formless scrawl of a beginner, but a piece of handwriting already recognizable and surprisingly beautiful." — Maria Montessori, The Discovery of the Child
Welcome to Lesson of the Day #95! Today we turn our attention to one of the most iconic, beautiful, and profoundly effective materials in all of Montessori education — the Sandpaper Letters. If you followed along with LOTD #93: The Sound Game (I Spy), your child has already begun the magical journey of becoming aware of the individual sounds within spoken words. The Sound Game gave your child the ears for reading. Now, the Sandpaper Letters give your child the eyes and the hands.
Sandpaper Letters are the multi-sensory bridge that connects what your child already knows — the sounds of spoken language — to something entirely new: the visual symbols that represent those sounds on a page. When your child traces the rough, textured surface of a sandpaper letter while hearing (and saying) its phonetic sound, three channels of learning fire simultaneously — visual, tactile, and auditory. This triple-encoding is what makes the Montessori approach to reading so remarkably effective. It is why Montessori children often seem to "explode" into writing and reading with a confidence and naturalness that surprises everyone except their teachers.
In this lesson, I'll walk you through everything you need to know about Sandpaper Letters: what they are, why they work, how to present them to your child step by step, which letters to introduce first, how to handle common challenges, how to make your own DIY set, and how this material connects to the larger Montessori language sequence. Whether you're homeschooling, supplementing your child's Montessori classroom experience, or simply curious about this approach, this guide will give you the knowledge and confidence to bring Sandpaper Letters to life in your home.
Let's begin.
📖 What Are Sandpaper Letters?
Sandpaper Letters are beautifully simple materials: each letter of the alphabet is cut from fine-grained sandpaper and mounted on a smooth, sturdy wooden board. When your child runs her fingertips over the letter, she feels a distinct textural contrast — the rough sandpaper of the letter shape against the smooth wood of the board. This contrast is deliberate and essential. It tells the child's fingers, "You are on the letter" or "You have gone off the letter," providing immediate, self-correcting sensory feedback without any adult intervention.
In a traditional Montessori set:
- Consonants are mounted on pink (or red) boards
- Vowels are mounted on blue boards
- The letters are lowercase — because lowercase letters are what children encounter most frequently in reading
- Many Montessori programs use cursive letterforms (more on this choice below), though print-style sets are also widely available
The color-coding serves an important purpose: from the very first day, without any explicit lesson about it, the child begins to absorb the distinction between vowels and consonants. This becomes relevant later when the child works with the Moveable Alphabet (which uses the same color scheme) and begins to understand patterns in word construction.
A complete set contains 26 boards — one for each letter of the alphabet. Some sets also include boards for common digraphs (such as "sh," "ch," "th," "oo," "ee") which are introduced later, after the single letters have been mastered.
Why Lowercase? Why Cursive?
Parents are often surprised that Montessori starts with lowercase letters rather than capitals. The reasoning is practical: over 95% of the text your child will encounter in books, signs, and everyday print is in lowercase. Capital letters are important, certainly, but they come later in the Montessori sequence — the child first masters the letters she'll use and see most often.
The cursive-versus-print question generates lively debate in Montessori circles. Maria Montessori herself favored cursive for several reasons:
- Cursive letters flow naturally from the hand's movement. Young children find the continuous, curving strokes of cursive more compatible with their natural hand movements than the stop-and-start strokes of print.
- Each cursive letter is distinct. In print, letters like "b," "d," "p," and "q" are easily confused — they're essentially the same shape rotated or flipped. In cursive, each of these letters looks quite different, reducing confusion.
- Words in cursive have clear boundaries. Because cursive letters within a word are connected, the child can easily see where one word ends and the next begins.
That said, many modern Montessori programs — especially in the United States — use print-style Sandpaper Letters because print is what children see in books, on screens, and in their environment. Either choice is valid. The most important thing is consistency: whatever style you choose for Sandpaper Letters, use the same style for the Moveable Alphabet and other language materials.
🧠 Why Sandpaper Letters Work: The Science of Multi-Sensory Learning
Maria Montessori was, in many ways, a neuroscientist before neuroscience existed. She observed that children learn most deeply when multiple senses are engaged simultaneously — and modern brain research has confirmed this observation with remarkable precision.
When your child traces a Sandpaper Letter, here is what happens in her brain:
- The visual cortex processes the shape of the letter — its curves, lines, and proportions
- The somatosensory cortex processes the tactile information from the fingertips — the roughness of the sandpaper, the directionality of the strokes
- The motor cortex plans and executes the finger movements required to trace the letter — movements that are the same movements needed later for writing
- The auditory cortex processes the phonetic sound being spoken aloud — either by the adult or by the child herself
- The language centers (Broca's and Wernicke's areas) connect the sound to meaning and to the motor patterns of speech
All of this happens at once, in a single, integrated moment of learning. The result is a neural connection between sound and symbol that is far stronger, far more durable, and far more accessible than what any single-sense approach could achieve. A child who has only seen the letter "m" knows it visually. A child who has seen it, traced it, and said its sound simultaneously knows it in her body — in her fingers, in her muscles, in her voice, in her ears, and in her eyes. That letter becomes part of her in a way that is difficult to forget.
This is why Montessori children often begin writing before they begin reading — a phenomenon Montessori called the "explosion into writing." The Sandpaper Letters have prepared the hand for writing (through the tracing movements) and the mind for encoding (through the sound-symbol association). When the child picks up a pencil or arranges Moveable Alphabet tiles, the knowledge is already there, stored in muscle memory and multisensory neural pathways, waiting to pour out.
Research in sensorial education continues to validate what Montessori understood more than a century ago: children are sensorial learners. They construct their understanding of the world through touch, movement, sight, sound, and exploration. The Sandpaper Letters honor this truth completely.
🪜 Where Sandpaper Letters Fit in the Montessori Language Sequence
Understanding where Sandpaper Letters sit in the larger Montessori language curriculum helps you appreciate their role and know when your child is ready. Here is the sequence:
- The Sound Game (I Spy) — The child develops phonemic awareness: she learns to hear and isolate individual sounds in spoken words. No letters are involved. (See LOTD #93 for a complete guide.)
- Sandpaper Letters (this lesson!) — The child learns the visual symbol that corresponds to each sound she already knows. She sees the letter, traces it, and says its sound.
- The Moveable Alphabet — The child begins to encode (spell/write) words by arranging loose letter tiles on a mat. She says a word, isolates each sound, and selects the corresponding letter.
- Phonetic Reading — The child begins to decode (read) short phonetic words, often using phonetic word lists, small booklets, and reading command cards.
- Phonogram Introduction — The child learns letter combinations that make new sounds (sh, ch, th, ai, ee, oo, etc.)
- Advanced Reading — The child reads increasingly complex text with confidence and comprehension.
Notice that the Sound Game comes before Sandpaper Letters. This is critically important. A child who already knows that "mouse" starts with /mmm/ is ready to learn that /mmm/ is written as "m." But a child who has not yet developed phonemic awareness will be memorizing abstract shapes without any meaningful connection to the sounds of language — and that is rote learning, not Montessori learning.
If you haven't yet played the Sound Game extensively with your child, I encourage you to start there. Visit our complete guide to the Sound Game (LOTD #93) and spend a few weeks (or more) building your child's sound awareness before introducing the letters. The investment will pay enormous dividends.
It's also worth noting that Sandpaper Numbers (LOTD #94) use the exact same tactile approach for numerals 0–9. If your child is working with Sandpaper Letters, she can simultaneously explore Sandpaper Numbers in the math curriculum — the presentation technique is identical, and children love discovering this parallel.
Ages
Sandpaper Letters are typically introduced between 3 and 4½ years old, though the range can extend from about 2½ to 5 depending on the individual child. The key readiness indicator is not age but phonemic awareness: can your child identify the beginning sound of a spoken word? If she can play Level 1 of the Sound Game with confidence — consistently picking out objects that begin with a given sound — she is ready for Sandpaper Letters.
Other signs of readiness include:
- Strong interest in letters, words, signs, or writing
- Asking, "What does that say?" when she sees print
- Attempting to "write" or draw letters
- Good fine motor control — evidenced by success with Practical Life activities like pouring, spooning, and using tweezers, and with sensorial materials like the Knobbed Cylinders
- Ability to focus on a one-on-one presentation for 5–10 minutes
Remember: there is no rush. Montessori is about following the child, not meeting arbitrary timelines. A child who begins Sandpaper Letters at four-and-a-half and is truly ready will progress faster and with more joy than a child who is pushed to begin at three before she has the prerequisite awareness and interest.
🎯 The Complete Presentation: How to Introduce Sandpaper Letters
Sandpaper Letters are presented using the Three-Period Lesson — Montessori's classic, elegant technique for teaching new concepts. If you're not yet familiar with the Three-Period Lesson, I strongly recommend reading our complete guide before beginning. It is one of the most versatile and powerful tools in your Montessori toolkit, and you'll use it not only for letters but for countless other materials.
Here is the full, detailed presentation, step by step.
Before You Begin: Choosing the First Letters
You will introduce two or three letters at a time — never more. Choose letters that are:
- Very different in appearance — so the child can easily distinguish the shapes (don't pair "b" and "d," or "m" and "n")
- Very different in sound — so the child can easily distinguish the phonemes (don't pair /b/ and /p/, which are produced almost identically)
- Personally meaningful — ideally, include a letter from the child's own name in the first set. There is something magical about a child learning "her" letter first. If your child's name is Sofia, starting with "s" is a lovely choice.
- Useful for early word-building — letters that appear frequently in short phonetic words will be useful sooner when the child progresses to the Moveable Alphabet
A classic first set might be: s, m, and a (or s, m, and t). These letters look very different from each other, sound very different, and are among the most common in English. With just "s," "a," "m," and "t," a child can later spell "mat," "sat," "Sam," "am," and "at" with the Moveable Alphabet — a thrilling accomplishment.
Here is a suggested order for introducing all 26 letters, in groups of 2–3. This is a guide, not a rigid rule — adapt based on your child's interests and the sounds she already knows from the Sound Game:
| Group | Letters | Notes |
|---|---|---|
| 1 | s, m, a | Visually and phonetically distinct; good starter set |
| 2 | t, r, i | Common letters; "i" adds a second vowel |
| 3 | b, f, o | Third vowel introduced |
| 4 | c, g, u | Use hard /k/ for "c" and hard /g/ for "g" |
| 5 | l, h, e | All five vowels now introduced |
| 6 | d, n, p | Introduce "d" well after "b" to avoid confusion |
| 7 | j, k, w | Less common consonants |
| 8 | v, y, z | Remaining consonants |
| 9 | q, x | Least common; introduced last |
You don't need to wait until one group is perfectly mastered before introducing the next. Once your child confidently knows the first 2–3 letters, you can introduce 2–3 more while continuing to review the earlier ones. The pace is determined by the child — some children learn a new letter every day, while others need a week or more with each group.
Setting Up
Choose a quiet, uncluttered space. A small mat on a table or on the floor works beautifully. Sit beside your child — to her dominant-hand side if possible — so she sees the letters from the same orientation you do.
Have your first 2–3 Sandpaper Letter boards ready, face down on the mat (or in a small stack). You want to reveal each letter with a bit of ceremony — this is a special moment.
The Presentation
Step 1: Introduce the First Letter
Pick up the first Sandpaper Letter board (let's say it's "m") and place it in front of the child. Take a quiet moment to let her look at it.
Then, with your index and middle fingers held together (the "tracing fingers"), slowly and deliberately trace the letter on the sandpaper surface. As your fingers move, say the phonetic sound: /mmm/.
Your tracing should be:
- Slow and deliberate — this is not a race. Let your fingers move at a pace the child can follow and absorb
- In the correct formation — start where the letter naturally begins when writing. For "m," start at the top of the first stroke and trace down, then back up and over the first hump, down, up and over the second hump, and down
- With light, even pressure — you want to feel the sandpaper, not press through it
- Accompanied by the sound — say /mmm/ as you trace, or immediately after. Some teachers say the sound continuously while tracing; others say it once before and once after. Either is fine.
Trace the letter two or three times, saying /mmm/ each time.
Then invite the child: "Would you like to try?"
Guide her hand gently if needed — you can place your hand lightly over hers for the first tracing to show the direction of movement. Then let her trace independently. As she traces, say /mmm/ — and encourage her to say it too.
If she traces in the wrong direction, gently guide her: "Let me show you — we start here." Then demonstrate again. Don't make a fuss about direction at this stage — the most important thing is that she is touching the letter and hearing the sound. Correct formation will come with practice.
Step 2: Introduce the Second Letter
Set the "m" board to one side and bring out the second letter (let's say "s"). Repeat the same process: trace the letter slowly while saying /sss/, then invite the child to trace and say the sound.
Step 3: Introduce the Third Letter (optional)
If the child is engaged and alert, introduce a third letter (let's say "a"). Same process. If she seems tired or distracted, stop at two — you can always add the third letter tomorrow.
Step 4: The Three-Period Lesson
Now all two or three letters are arranged on the mat in front of the child. This is where the Three-Period Lesson begins:
Period 1 — Naming (Introduction): You've already done this in Steps 1–3. The child has seen, traced, and heard each letter. To reinforce, point to each one and say its sound: "/mmm/… /sss/… /aaa/."
Period 2 — Recognition (Practice): This is the heart of the lesson. You ask the child to identify each letter by its sound — and you do so playfully, with variety and movement. Here are some ways to play Period 2:
- "Show me /sss/." (Child points to or picks up the "s" board.)
- "Can you trace /mmm/?" (Child traces the "m" and says /mmm/.)
- "Put /aaa/ on the mat and /sss/ on the table." (Adds movement and fun.)
- "Can you hand me /mmm/?"
- "Point to /sss/ and then point to /aaa/."
- "Close your eyes. I'm going to put one letter in your hands. Can you trace it and tell me what sound it makes?" (This is a wonderful tactile extension — the child identifies the letter by touch alone!)
Spend the most time in Period 2. This is where the learning is cemented. Mix up the order, vary your requests, keep it playful and engaging. If the child is making errors, stay in Period 2 — she needs more practice with recognition before moving to recall.
Period 3 — Recall (Assessment): Only when the child is confidently and correctly responding to Period 2 requests do you move to Period 3. Point to a letter and ask: "What sound does this make?" or "Can you tell me this sound?"
The child says the sound. If she's correct, wonderful! If not, don't correct directly — simply say, "This is /sss/. Can you trace /sss/ for me?" and return to Period 2 for more practice.
Important: It is perfectly fine — and very common — for a child to succeed in Period 2 but not yet in Period 3. Period 3 (recall) is the hardest step. If your child can't recall the sounds independently today, she will likely be able to in a day or two with continued practice. Never push or express disappointment. The Three-Period Lesson is designed so that the child always succeeds — you simply stay at the period where she is comfortable and give her more time.
After the Presentation: Review and Practice
In the days following the initial presentation, review the letters your child has learned. A brief review session might look like this:
- Lay out the known letters on the mat
- Ask the child to trace each one and say its sound
- Play a few rounds of Period 2 ("Show me /mmm/.")
- If she's ready, try Period 3 ("What sound is this?")
- Introduce one or two new letters using the full Three-Period Lesson
Keep review sessions short — 5 to 10 minutes is ideal. Consistency matters more than duration. A few minutes every day is far more effective than a long session once a week.
✋ The Tracing Technique: Details That Matter
The way the child traces the Sandpaper Letters is not incidental — it is the very mechanism by which the material works. Here are the details that matter:
Which Fingers?
The child traces with the index and middle fingers held together, using the pads of the fingertips. This two-finger approach is deliberate: these are the same fingers that will later hold a pencil (along with the thumb), and tracing with them builds the specific muscle memory and motor control needed for writing.
Some children will naturally want to trace with just one finger, or with their whole hand. Gently guide them to use the two-finger technique. You might say: "Let's use these two special tracing fingers — like this." Show her by holding your own index and middle fingers together.
Which Hand?
The child traces with her dominant hand. If you're not yet sure which hand is dominant (hand dominance is typically established between ages 3 and 5), let the child choose naturally. Observe which hand she reaches for the letters with, and let that hand do the tracing.
Direction and Starting Point
The child should trace the letter in the correct writing formation — starting where a writer would start and moving in the direction a writer would move. This is because tracing the Sandpaper Letters is a direct preparation for writing. Each time the child traces, she is rehearsing the motor pattern she will use when she picks up a pencil.
For most lowercase letters, the starting point and direction are intuitive. A few that can be tricky:
- a: Start at the top of the circle (about 2 o'clock position), go counterclockwise around the circle, then straight down the right side
- d: Start at the top of the circle (not the tall stick), go counterclockwise around, then up the tall stick and back down
- e: Start in the middle with a horizontal stroke to the right, then curve up and around counterclockwise
- f: Start at the top, curve down the tall stroke, then lift and add the cross stroke from left to right
- s: Start at the top and curve — this one takes practice!
If you're unsure about the correct formation for any letter, most Sandpaper Letter sets come with a small guide card showing starting points and directional arrows. You can also find letter formation charts online.
Speed
Slow is beautiful. The child should trace slowly enough to truly feel every curve and line of the letter. As she becomes more familiar with a letter, her tracing will naturally speed up — and that's fine. But especially in the early presentations, encourage a slow, mindful pace.
Saying the Sound
Every time the child traces, she should say (or hear) the phonetic sound. This simultaneous multi-sensory input — see the shape, feel the texture, hear the sound — is what makes the learning so powerful. For continuous sounds like /mmm/, /sss/, /fff/, and the vowels, the child can stretch the sound to last the duration of the tracing. For stop sounds like /b/, /t/, /k/, she can say the sound once at the beginning or end of each tracing.
🗣️ A Critical Reminder: Sounds, Not Letter Names
This point cannot be emphasized enough. When presenting Sandpaper Letters — and indeed throughout the entire early literacy journey — always use the phonetic sound of the letter, never the letter name.
The letter "m" is not introduced as "em." It is introduced as /mmm/. The letter "s" is not "ess" — it is /sss/. The letter "b" is not "bee" — it is /b/ (a short, quiet pop of the lips, without adding "uh" after it).
Why? Because reading requires blending sounds together. A child who knows that "c" says /k/, "a" says /aaa/, and "t" says /t/ can blend those sounds into "cat" naturally. But a child who knows these letters as "see," "ay," and "tee" would have to blend "see-ay-tee" — which sounds nothing like "cat" and leads to confusion and frustration.
Some sounds that parents commonly mispronounce:
- B → /b/ (a soft pop) — not "buh"
- C → /k/ (from the back of the throat) — not "see" or "kuh"
- D → /d/ (tongue tap) — not "duh"
- G → /g/ (back of throat) — not "jee" or "guh"
- H → /h/ (a gentle breath) — not "aitch"
- T → /t/ (crisp tongue tap) — not "tuh"
- W → /w/ (lips rounded) — not "double-you"
For a complete guide to all 26 phonetic sounds, including short vowels, visit our Alphabet Phonetic Sounds reference page. Bookmark it and refer to it often — especially in the beginning, as you're building your own confidence with the sounds.
If other family members or caregivers are teaching your child letter names, don't panic. Children are flexible. Simply be consistent in your own practice: "That letter is called 'em,' but the sound it makes is /mmm/. When we trace our letters, we use the sound!"
🎨 Extensions and Variations
Once your child has been introduced to several Sandpaper Letters and is gaining confidence, there are many wonderful ways to extend and deepen the learning. These extensions keep the material fresh, challenge the child in new ways, and strengthen the neural pathways being built.
The Blindfold Game (Mystery Letter)
This is a favorite in Montessori classrooms — and children find it thrilling. Blindfold the child (or simply ask her to close her eyes) and place a Sandpaper Letter in her hands. She traces the letter with her fingers and tries to identify it by touch and muscle memory alone. "What sound does this letter make?"
This game strengthens the tactile memory powerfully because it removes the visual input entirely, forcing the child to rely on what her fingers know. It also builds confidence — the child discovers that she knows these letters in her body, not just in her eyes.
Sand Tray Writing
After tracing a Sandpaper Letter, invite the child to "write" the same letter in a tray of sand (or salt, cornmeal, or even kinetic sand). Spread a thin layer of sand in a shallow tray or box lid, and let the child use her index finger to draw the letter in the sand. She can shake the tray to erase and write again.
The sand tray provides a forgiving, low-pressure writing surface — there's no "wrong" mark, because everything can be erased with a gentle shake. It's a beautiful intermediate step between tracing (following an existing shape) and writing (producing the shape independently).
The Chocolate Pudding Alternative
If your child doesn't enjoy the rough texture of sandpaper (and some children genuinely don't — sensory preferences vary), here's a delightful alternative: spread chocolate pudding, whipped cream, or shaving cream on a smooth tray or sheet of butcher paper and let your child trace letter shapes in it while you say the phonetic sounds together. It's messy, memorable, tactile — and it works. The key elements are preserved: the child is forming the letter shape with her fingers while hearing the sound.
Letter Matching
Lay out several Sandpaper Letters on a mat. Then give the child a basket of small objects — each one beginning with the sound of one of the displayed letters. The child places each object next to the letter that makes its beginning sound. A miniature mouse goes next to "m," a toy sun next to "s," a small apple next to "a."
This extension beautifully connects the Sandpaper Letters back to the Sound Game — the child is now combining her phonemic awareness (hearing the beginning sound) with her letter knowledge (knowing the symbol for that sound). This is the bridge between sound and symbol made visible.
Letter Rubbings
Place a thin sheet of paper over a Sandpaper Letter and let the child rub a crayon over it to produce a raised impression of the letter. This creates a beautiful sensory experience and produces something the child can keep — children love collecting their letter rubbings in a small folder or notebook.
Outdoor Letters
Take the letter-forming practice outside: draw letters in dirt with a stick, trace them in wet sand at the beach, paint them on the sidewalk with a wet brush (they dry and disappear — magic!), or form them with sticks, leaves, and pebbles. The possibilities are endless, and bringing letter work into the outdoor environment adds novelty and joy.
Letters in Rice or Beans
Fill a shallow tray with rice or dried beans. Hide Sandpaper Letters underneath. The child reaches in, feels for a letter, traces it with her fingers while it's still hidden, and guesses the sound before pulling it out. This combines the blindfold game with a delightful sensory treasure hunt.
Connecting to the Moveable Alphabet
Once your child knows 8–12 letters — ideally including at least 2–3 consonants and 1–2 vowels — she is ready to begin work with the Moveable Alphabet. This is an electrifying milestone: the child can now spell words. She doesn't need to know all 26 letters first. Even with just the letters s, m, a, t, she can build "mat," "sat," "am," and "at." The joy on a child's face when she realizes she can create real words is one of the most beautiful moments in Montessori education.
Continue introducing new Sandpaper Letters alongside the Moveable Alphabet work — the two materials complement each other beautifully. As the child learns each new letter, her word-building vocabulary expands.
🛠️ DIY Sandpaper Letters: Make Your Own at Home
While commercially made Sandpaper Letters are beautiful and durable, you can absolutely create an effective set at home. Here's how:
Materials You'll Need
- 26 smooth, sturdy boards — you can use wooden boards (craft stores sell smooth wooden plaques), heavy cardboard, or foam board. A good size is approximately 6" × 8" (15 cm × 20 cm) — large enough for the child to trace comfortably.
- Fine-grit sandpaper — 150-grit or finer works well. You want a texture that's noticeably rough but not abrasive.
- Paint or colored paper — pink/red for consonant boards, blue for vowel boards (or whatever two contrasting colors you prefer).
- Letter templates — printed in the correct size and style (cursive or print). We offer a free printable set below!
- Scissors and glue — craft glue or spray adhesive works well for affixing sandpaper to boards.
Step-by-Step Instructions
- Prepare the boards: Paint or cover your boards — pink for consonants, blue for vowels. Let dry completely.
- Print the letter templates: Use our free printable (below) or draw your own. The letters should be large — about 4–5 inches tall — so the child can trace comfortably.
- Transfer the letters to sandpaper: Place each template on the back (smooth side) of the sandpaper and trace around it. Then carefully cut out the sandpaper letter.
- Glue the sandpaper letters to the boards: Use craft glue or spray adhesive. Make sure the sandpaper side faces up (rough texture visible and touchable).
- Let everything dry thoroughly before presenting to your child.
Alternative DIY Methods
- Glue and sand method: Instead of cutting letters from sandpaper, draw or trace the letter shapes directly onto the boards with a thick line of white glue, then sprinkle fine craft sand over the glue. Shake off the excess and let dry. This creates a wonderfully textured letter.
- Textured paper or fabric: If your child is sensitive to sandpaper's roughness, try felt, velvet, or textured craft paper instead. The key is that the letter has a distinctly different texture from the board.
- Puffy paint: Trace letters with puffy paint (the kind that dries raised) on smooth cardstock. When dry, the raised surface provides tactile feedback similar to sandpaper.
Free Printable: Cursive Sandpaper Letters
We've created a free printable set of all 26 cursive lowercase letters, sized and formatted for making your own Sandpaper Letters at home. Print on cardstock, use as templates for cutting sandpaper, or glue and sand directly over the printed letters.
⬇️ Download Free Cursive Sandpaper Letters Template (PDF)
🛒 Recommended Sandpaper Letter Sets
If you'd prefer to purchase a ready-made set (and there's absolutely no shame in that — commercial sets are precisely crafted and built to last years of use), here are our top recommendations:
- 👉 Kid Advance Montessori Lower Case Sandpaper Letters w/Box — A quality print-style set with smooth wooden boards and a convenient storage box. An excellent choice for families who prefer print letterforms.
- 👉 Montessori Lower Case Cursive Sandpaper Letters w/Box — Beautiful cursive lowercase set, perfect for families following the traditional Montessori approach. The cursive formation is clear and well-proportioned.
- 👉 Elite Montessori Lower and Capital Case Sandpaper Letters with Box — A comprehensive set that includes both lowercase and capital letters, which is wonderful value if you want to have capitals ready for when your child is ready for that next step.
When choosing a set, look for:
- Fine-grit sandpaper that is firmly adhered to the boards (rough enough to feel, smooth enough not to irritate young fingers)
- Correct letter formation — the starting points and strokes should follow standard writing conventions
- Consistent color-coding (pink/red for consonants, blue for vowels)
- A storage box or tray — Sandpaper Letters need to be stored upright or flat to prevent the sandpaper from peeling; a box keeps them organized and protected
💡 Tips for Parents: Making the Most of Sandpaper Letters
1. Prepare the Hand Before Preparing the Mind
The Sandpaper Letters work best when the child's hand is already skilled at controlled, precise movements. Practical Life activities — pouring, spooning, transferring with tweezers, using tongs, threading beads, and working with dressing frames — all strengthen the fine motor control and finger dexterity that make tracing (and later writing) possible. Sensorial materials like the Knobbed Cylinders and the Pink Tower also refine the child's hand-eye coordination and grip.
If your child is struggling with the tracing motion, consider whether she needs more fine motor preparation. A few weeks of focused Practical Life work can make a significant difference.
2. Two or Three Letters at a Time — No More
It's tempting to introduce letters quickly, especially when your child seems enthusiastic. Resist the urge. The Three-Period Lesson is specifically designed for small groups of 2–3 new concepts. Introducing too many letters at once overwhelms the child's working memory and leads to confusion rather than mastery.
Quality over quantity. A child who truly knows three letters — who can trace them, say their sounds, and identify them confidently — is far better prepared than a child who has been shown 10 letters but can only vaguely recall a few.
3. Review Daily (But Keep It Brief)
The Sandpaper Letters should be available for your child to use every day, and a brief review of known letters should be part of your routine. But "brief" means brief: 3–5 minutes of tracing and sound identification is perfect. The child should walk away feeling successful and energized, not drained.
Make review playful: "Let's see how many letter sounds you remember today! Close your eyes — I'll put one in your hands."
4. Follow Your Child's Interests
Does your child love dinosaurs? Start with "d." Is she fascinated by cats? Start with "c" (and remind yourself to use /k/, not "see"!). Is she proud of her name? Start with the first letter of her name. When letters connect to things the child cares about, the learning is infused with meaning and motivation.
5. Don't Worry About Reversals
It is completely normal for young children to reverse letters — tracing them backward, confusing "b" and "d," writing "s" as a mirror image. This is a developmental stage, not a learning problem. The Sandpaper Letters actually help prevent reversals because the child learns each letter through directed movement, not just visual recognition. But reversals may still appear, and they will resolve on their own with time and practice. Be patient and continue to model the correct formation calmly.
6. Connect Letters to the Sound Game
Keep playing the Sound Game even after you've begun Sandpaper Letters. The two activities complement each other beautifully. After playing "I Spy" and identifying that "mouse" starts with /mmm/, you can say: "And do you remember which letter makes the /mmm/ sound? Would you like to trace it?" This brings the Sound Game full circle — from sound awareness, to symbol knowledge, and back to the real world of words.
7. Be Patient with Texture Sensitivity
Some children love the feeling of sandpaper; others find it unpleasant or even distressing. If your child resists the sandpaper texture, never force it. Instead, try alternative textures: felt, velvet, raised puffy paint, or the sand/salt tray approach. You can also try having the child trace with a small paintbrush or a cotton-tipped stick instead of bare fingers. The principle — learn the letter through directed, multi-sensory tracing — is what matters, not the specific texture.
8. Create a Beautiful, Inviting Space
Montessori materials are meant to be beautiful, and the way you present them matters. Store your Sandpaper Letters neatly in a box or on a low shelf where the child can access them independently. When you present the letters, do so on a clean mat, with focus and presence. This tells the child: "This is important. This is special. These letters deserve our careful attention."
9. Resist the Worksheet Temptation
Once your child knows several letters, you may be tempted to reinforce the learning with worksheets, flash cards, or alphabet drills. In the Montessori approach, we trust the materials. The Sandpaper Letters, the sand tray, the Sound Game, and the Moveable Alphabet provide all the practice a child needs — and they do so in a way that is hands-on, self-directed, and joyful. Worksheets reduce letter learning to a visual-only, two-dimensional exercise and can drain the joy from what should be an exciting discovery.
10. Celebrate the Process, Not Just the Product
It's natural to be eager for your child to "know all her letters." But the real magic of Sandpaper Letters is not in the final tally of letters mastered — it's in the process: the quiet concentration of a child tracing a letter for the tenth time, the delight on her face when she recognizes a letter "in the wild" (on a cereal box, a street sign, a book cover), the growing confidence as her hand learns the movements of writing. Celebrate these moments. They are the building blocks of a lifelong love of literacy.
📋 A Sample Week with Sandpaper Letters
To give you a concrete sense of what Sandpaper Letter work looks like in daily practice, here's a sample week for a child who is just beginning. Adjust the pace based on your child — faster or slower are both perfectly fine.
Monday
New letters: m, s
Present "m" and "s" with the full Three-Period Lesson. Trace each letter together, saying the sounds. Play Period 2 games: "Show me /mmm/." "Can you trace /sss/?" If time and interest allow, try Period 3: "What sound does this one make?"
Tuesday
Review: m, s | New letter: a
Quick review of "m" and "s" — the child traces each and says the sound. Then introduce "a" with the full Three-Period Lesson. Now do Period 2 with all three letters on the mat.
Wednesday
Review: m, s, a
Review all three letters. Play the blindfold game: close eyes, trace a letter, guess the sound. Extend with the sand tray: trace "m," "s," and "a" in sand. Play a quick Sound Game: "I spy something that starts with /mmm/!"
Thursday
Review: m, s, a | Optional new letter: t
Brief review. If the child is confidently recalling the sounds of all three letters (Period 3), introduce "t" with a fresh Three-Period Lesson. If not, continue reviewing and strengthening the first three.
Friday
Review and play
Review all known letters. Do a letter-object matching activity: lay out the known Sandpaper Letters and a basket of small objects, and let the child sort objects to the correct letter by beginning sound. Perhaps try a letter rubbing or outdoor letter tracing for variety.
Weekend
Casual practice
Point out letters in the environment: "Look — that sign says 'STOP.' Can you find the letter that makes /sss/?" Play the Sound Game at the grocery store. Let the child trace letters in the bathtub with soap crayons. Keep it light and fun — no formal lessons needed.
❓ Frequently Asked Questions
How long does it take to learn all 26 letters?
It varies enormously from child to child. Some children learn all 26 letters in 2–3 months; others take 6 months or longer. Both timelines are completely normal. The pace depends on the child's age, interest, phonemic awareness, frequency of practice, and individual development. There is no deadline. What matters is that the child learns each letter deeply and joyfully — not that she learns them quickly.
Should I teach uppercase letters too?
In the Montessori sequence, lowercase letters are taught first because they are what the child encounters most in reading. Capital letters are introduced later — typically after the child is comfortable with all lowercase letters and has begun work with the Moveable Alphabet. When the time comes, you can introduce capitals with a separate set of Sandpaper Letters or with simple matching activities that pair each capital to its lowercase counterpart.
My child wants to learn letter names, not sounds. What do I do?
If your child has already been exposed to letter names (from TV, books, family members, or preschool), she may resist using sounds. Be patient but consistent. You might say: "That letter is called 'em' — that's its name. And its sound is /mmm/. The sound is what we use when we read. Listen: /mmm/… mouse! /mmm/… mat! Isn't that cool?" Over time, as the child sees the power of sounds for reading and spelling, she'll understand why sounds matter. Meanwhile, knowing the letter names doesn't hurt — it just shouldn't replace sound knowledge.
What about children with special needs or learning differences?
The multi-sensory nature of Sandpaper Letters makes them particularly effective for children with dyslexia, ADHD, autism spectrum differences, and other learning profiles. The tactile component provides an additional input channel that can be especially powerful for children who struggle with purely visual or purely auditory approaches. You may need to slow the pace, reduce the number of letters per session (even to just one), and increase the amount of repetition — but the fundamental approach works beautifully across a wide range of learning profiles. If you have specific concerns, consult with a learning specialist who is familiar with Montessori methods.
Can I use Sandpaper Letters with a child who is older than 5?
Absolutely. While Sandpaper Letters are typically introduced between ages 3 and 5, any child who is still learning letter-sound associations can benefit from this multi-sensory approach. An older child might move through the material more quickly, but the tactile element is valuable at any age. For a child of 6 or 7 who is struggling with letters, Sandpaper Letters can be a revelation — finally, the letters "make sense" because the child is learning them through her body, not just her eyes.
Do I need Sandpaper Letters if my child already knows some letters?
Probably yes, with modification. Even if your child can visually identify several letters, Sandpaper Letters add the crucial tactile and motor dimensions. The tracing prepares the hand for writing in a way that visual recognition alone does not. You can move more quickly through letters your child already knows, but the tracing experience is valuable for all of them.
My child traces the letters in the wrong direction. Should I correct this?
Gently, yes. The correct formation is important because it directly prepares the child for writing. But "gently" is the key word. Simply say: "Let me show you — we start here" and demonstrate the correct starting point and direction. Then invite the child to try again. If she continues to trace incorrectly, guide her hand the first time through, then let her try independently. Don't make it a power struggle — accuracy will improve with practice and maturity.
How do Sandpaper Letters connect to Sandpaper Numbers?
The Sandpaper Numbers (LOTD #94) use exactly the same multi-sensory approach — numerals 0–9 cut from sandpaper and mounted on smooth boards. The presentation technique is identical: trace the numeral while saying its name. If your child is working with Sandpaper Letters in the language curriculum, she can simultaneously explore Sandpaper Numbers in the math curriculum. The parallel reinforces the tactile-learning approach and helps the child see connections across subject areas.
When should I introduce the Moveable Alphabet?
Once your child confidently knows approximately 8–12 letter sounds (including at least 2 vowels), she can begin working with the Moveable Alphabet. She doesn't need to know all 26 letters first! The Moveable Alphabet and Sandpaper Letters are used concurrently — the child continues learning new letters through Sandpaper Letters while spelling known words with the Moveable Alphabet. The two materials reinforce each other: the Moveable Alphabet gives the child a reason to know the letters (she can make words!), which motivates her to learn more of them.
What comes after Sandpaper Letters and the Moveable Alphabet?
After the child has built many words with the Moveable Alphabet and is comfortable with all 26 letter sounds, she's ready for phonetic reading — decoding written words. This typically involves phonetic word lists, small phonetic readers, reading command cards, and gradually more complex texts. She'll also begin learning phonograms (letter combinations like "sh," "ch," "th," "ee," "oo") that represent sounds not captured by single letters.
📚 The Montessori Philosophy Behind the Material
To truly understand Sandpaper Letters, it helps to understand the Montessori view of how children learn to read and write. Montessori's approach is based on several key insights:
Writing Comes Before Reading
This surprises many parents. In conventional education, reading is taught first and writing follows. Montessori reverses this. Why? Because writing (encoding) is a simpler cognitive task than reading (decoding). When a child writes the word "cat," she starts with a word she already knows, breaks it into sounds she can hear, and selects the symbols for those sounds. She's moving from the known (the spoken word) to the unknown (the written symbols). When a child reads the word "cat," she must look at abstract symbols, recall the sound each one makes, blend those sounds together, and recognize the resulting word — a more complex chain of operations.
Sandpaper Letters prepare for both, but they are especially powerful preparation for writing. Every tracing is a rehearsal for the hand movements of writing. The child who has traced "m" hundreds of times on a Sandpaper Letter will produce a beautiful, confident "m" when she first picks up a pencil — often to the astonishment of adults who didn't realize how much preparation had already taken place.
The Sensitive Period for Language
Montessori identified "sensitive periods" — windows of time during which children are intensely and naturally drawn to particular types of learning. The sensitive period for language spans from birth to approximately age 6, with a particularly intense phase between ages 3 and 5 for written language. During this window, children are fascinated by the symbols of language — they want to know what letters say, what signs mean, how their name looks in print.
Sandpaper Letters meet the child in this sensitive period with a material that satisfies her hunger for letter knowledge in the deepest possible way. A child in the sensitive period for language who is given Sandpaper Letters doesn't experience letter-learning as work — she experiences it as fulfillment of an inner need.
Indirect Preparation
This is one of Montessori's most beautiful concepts: many activities prepare the child for future skills without the child (or the adult) being explicitly aware of it. A child who has spent months pouring water, spooning beans, and threading beads in Practical Life has been indirectly preparing her hand for the controlled, precise movements of tracing and writing. A child who has worked with the Knobbed Cylinders has been refining the three-finger grip she'll use to hold a pencil. A child who has sorted objects by category in sensorial work has been indirectly preparing for the cognitive categorization involved in letter recognition.
By the time the child encounters Sandpaper Letters, she has been prepared. Her hand is ready. Her senses are refined. Her ear is attuned to sounds (through the Sound Game). The Sandpaper Letters don't begin the learning — they build upon a foundation that has been laid, layer by layer, through months of purposeful activity.
The Explosion into Writing
Montessori famously described a phenomenon she called the "explosion into writing" — a moment when, seemingly overnight, a child who has been working with Sandpaper Letters and the Moveable Alphabet suddenly begins writing words, sentences, even stories with passionate intensity. The child hasn't been "taught" to write in any conventional sense. Rather, all the indirect preparation — the fine motor work, the sound awareness, the letter tracing, the word building — converges, and the child discovers, with joy and astonishment, that she can write.
This explosion typically occurs between ages 4 and 5 in Montessori classrooms, though it can happen earlier or later. It is one of the most thrilling moments in a child's educational life — and it begins, in a very real sense, with those quiet moments of tracing a sandpaper letter and saying its sound.
🔗 Related Materials and Next Steps
Sandpaper Letters are one piece of a beautiful, interconnected language curriculum. Here are the key materials and guides that connect to this lesson:
- LOTD #93: The Sound Game (I Spy) — The essential prerequisite. Build phonemic awareness before introducing letter symbols.
- LOTD #94: Sandpaper Numbers — The math counterpart, using the same tactile approach for numerals 0–9.
- The Three-Period Lesson — The presentation technique used with Sandpaper Letters and many other Montessori materials.
- The Moveable Alphabet — The next major step: the child uses loose letter tiles to build words.
- Alphabet Phonetic Sounds — A complete reference guide to the correct phonetic sound for each letter.
- Phonetic Word Lists — Lists of short phonetic words, organized by pattern, for use with the Moveable Alphabet and early reading.
- Reading Command Cards — Engaging reading activities for children who have begun to decode words.
- Practical Life — Fine motor activities that indirectly prepare the hand for tracing and writing.
- What Is Sensorial Education? — The broader Montessori approach to learning through the senses.
- Knobbed Cylinders — A sensorial material that refines the pencil grip.
- Dressing Frames — Practical Life materials that develop fine motor coordination.
✨ A Final Thought
There is something profoundly moving about watching a child trace a Sandpaper Letter for the first time. Her small fingers move slowly across the rough surface. Her eyes follow the path her hand is making. She whispers the sound — /mmm/ — and you can almost see the connection forming in her mind: this shape IS this sound. This sound HAS a shape. In that quiet moment, a bridge is being built — a bridge from the spoken word to the written word, from the voice to the page, from the world she knows to the world she will one day read about in books.
This bridge, once built, will carry your child to places you cannot yet imagine. She will read stories that make her laugh and cry. She will write letters to people she loves. She will discover ideas in books that change the way she sees the world. And it all begins here, with a small rough letter on a smooth wooden board, and a parent or teacher who sits beside her and says, with warmth and patience: "/mmm/. This is /mmm/. Would you like to trace it?"
Montessori wrote that the Sandpaper Letters give the child "a key to the exploration of language." She was right. And you — sitting with your child on a mat, guiding her fingers over the textured surface, modeling the sounds with your voice — you are the one who places that key in her hand.
What a gift. What a privilege.
Start with two letters. Trace them slowly. Say the sounds with love. And trust the process. Your child will take it from here.
Happy teaching — and happy tracing!