Dressing Frames
Published on: June 30, 2007
Dressing Frames
Ages
2½ to 6 years old
Material
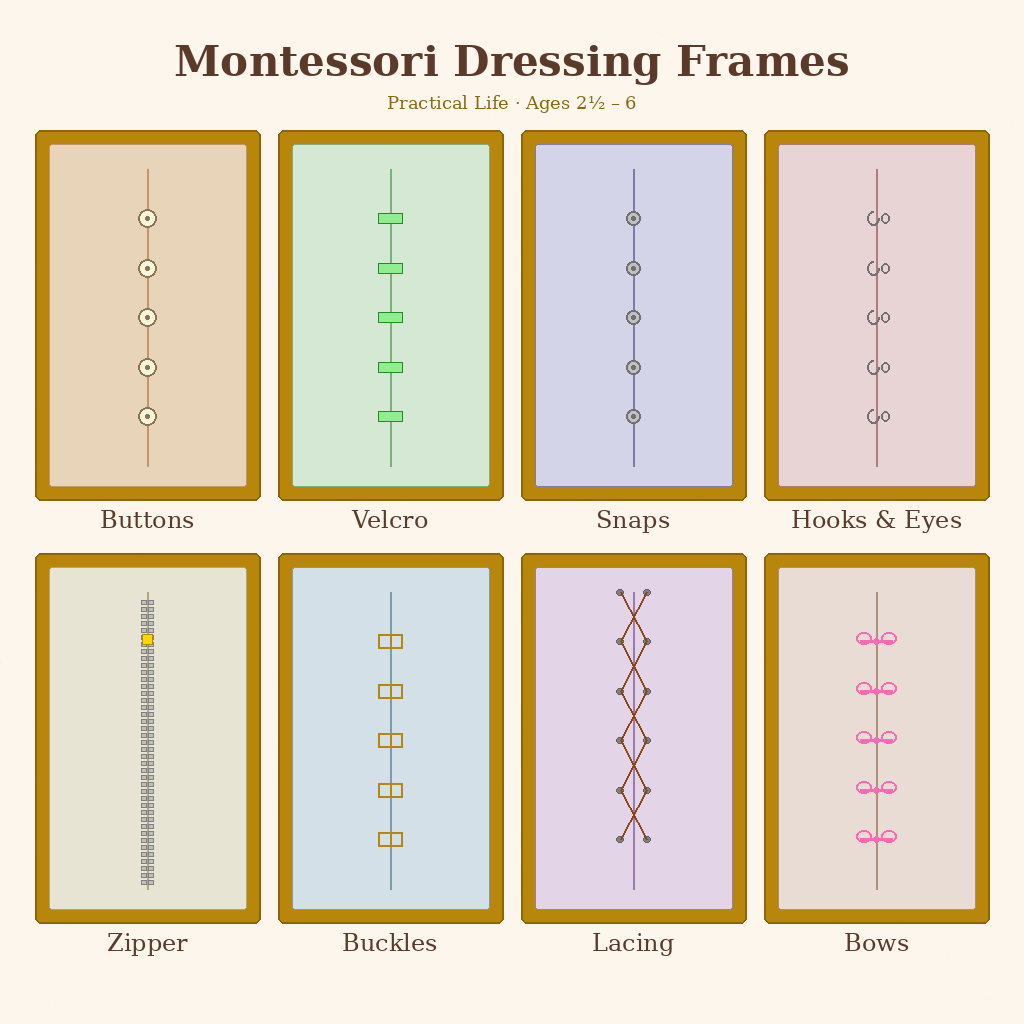
The traditional Montessori dressing frames consist of eight wooden frames, each approximately 12 inches by 12 inches. On each side of the frame, a finished piece of fabric is nailed or stapled in place. The fabric is cut down the middle, hemmed at the center edges, and fastened together using one of eight different types of closures:
- Large buttons (progressing to smaller buttons later)
- Velcro
- Snaps
- Hooks and eyes
- Zipper
- Buckles
- Shoe lacing
- Bows
You can make your own dressing frames at home by recycling old clothing — a shirt with buttons, a jacket with a zipper, or a dress with snaps can all be stitched onto simple wooden frames. This is a wonderful way to repurpose materials while creating meaningful learning tools for your child.
If you prefer ready-made frames, here are two excellent options:
- Montessori Practical Life Dressing Frames Set — a complete set for the home or classroom
- Montessori Dressing Frames for Toddlers Community Set of 6 — a wonderful starter set for younger children
Purpose
- To foster independence in dressing — one of the most empowering Practical Life skills a young child can master
- Development of fine motor skills and hand strength through manipulating small fasteners
- Refinement of eye-hand coordination and concentration
- Building self-confidence and self-esteem — when a child can dress themselves, they carry that sense of capability into everything they do
- Indirect preparation for writing through the precise finger movements required
- Encouraging a sense of order and sequence, as each fastener requires specific steps performed in a logical order
Presentation
Sit next to your child at a table or on the floor and begin with the large button frame — this is typically the easiest closure for young children to manage. Slowly and deliberately show your child how to unbutton the frame, working from top to bottom. Use both hands: hold the button in your right hand and the buttonhole fabric in your left hand. Gently push the button through the buttonhole, pausing so your child can observe each movement clearly.
Open the two flaps of fabric wide so your child can see the frame fully unfastened, then slowly refasten the buttons from top to bottom. Invite your child to try. Allow your child to do the rest of the buttons independently, stepping in only if they ask for help.
Maria Montessori emphasized breaking each exercise down into small, deliberate steps. When presenting each frame, isolate the movements and perform them slowly enough that the child's eyes and mind can absorb what the hands need to do. This careful, unhurried approach is at the heart of Montessori teaching.
Exercise
Introduce the dressing frames in order of difficulty. A good progression is:
- Velcro — the simplest; a wonderful starting point for the youngest children
- Snaps — requires a bit more finger pressure and alignment
- Large buttons — introduces the concept of threading through a buttonhole
- Small buttons — refines the same skill with greater precision
- Hooks and eyes — a delicate fastener that builds patience and focus
- Zipper — requires coordination of both hands working together
- Buckles — introduces threading and pulling through a frame
- Lacing and bows — the most complex; typically mastered closer to age 5 or 6
Make sure your child can comfortably perform one frame before moving on to the next. There is no rush — repetition is the child's friend. You will likely see your child return to favorite frames again and again, perfecting the movement until it becomes effortless. This is exactly what Montessori called "normalization" — deep concentration leading to satisfaction and inner calm.
Once your child masters the frames, encourage them to practice on their own clothing. Buttoning a coat, zipping a jacket, or tying shoes becomes a source of genuine pride. As part of your Early Practical Life curriculum, dressing frames lay the foundation for a child who moves through daily routines with confidence and grace.
Tips for Home
If you are following a Toddler Scope and Sequence for Practical Life Skills, dressing frames fit naturally into the care of self activities. Place the frames on a low shelf where your child can access them freely. Even a single frame is a worthwhile addition to your home environment — you don't need all eight to get started.
Remember that the ultimate goal is not mastering the frame itself, but transferring that skill to real life. When your child proudly buttons their own shirt or ties their own shoes for the first time, you will see the beautiful result of this simple, purposeful work. That moment of independence is what Montessori education is all about.