Lesson of the Day 90: The Red Rods (Long Rods) — Montessori's First Lesson in Length, Order, and the Joy of Building a Stair
Published on: June 01, 2026
Montessori Lesson of the Day #90 — Welcome back to our daily Montessori journey! Today we explore one of the most elegant and purposeful materials in the entire Montessori Sensorial curriculum: the Red Rods, also known as the Long Rods or the Long Stair. If your child has been working with the Pink Tower and the Knobbed Cylinders, the Red Rods are a natural and beautiful next step.
What Are the Red Rods?
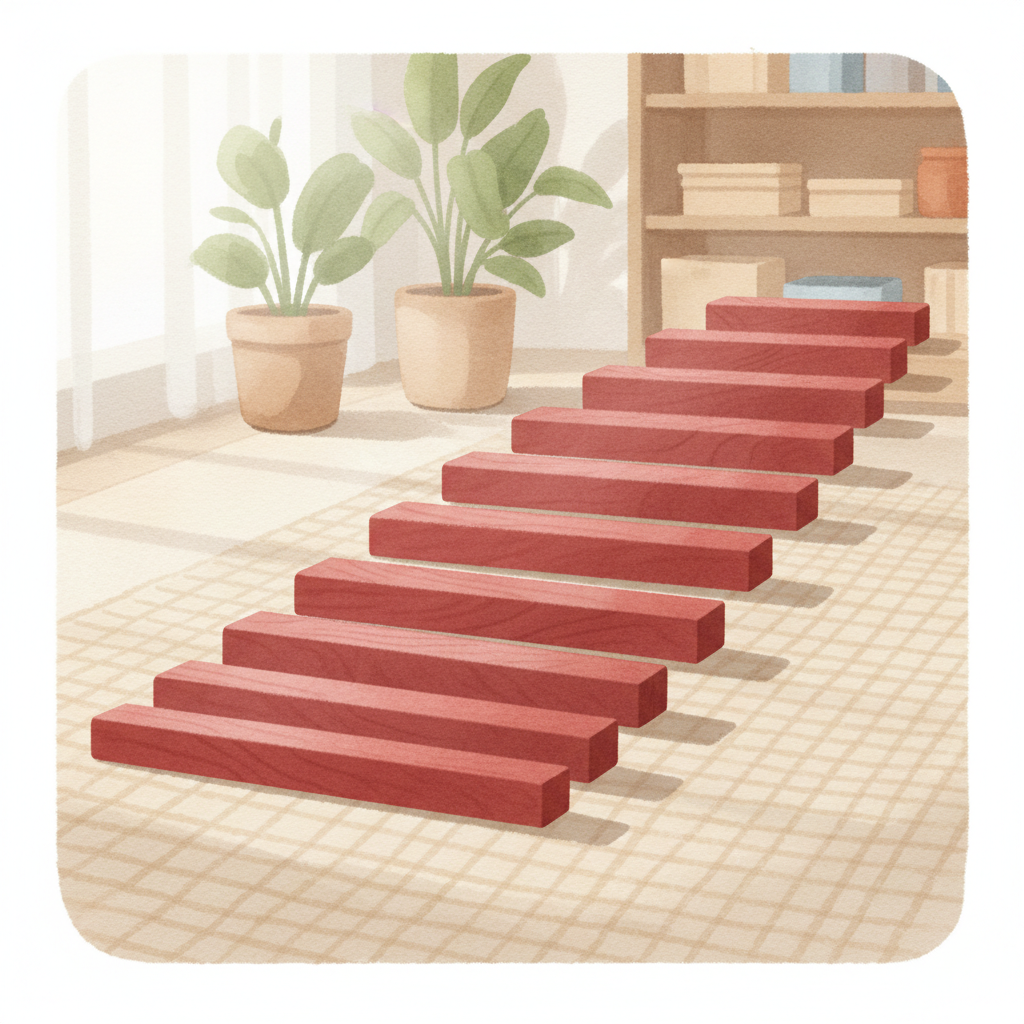
The Red Rods are a set of ten solid wooden rods, all painted a uniform, glossy red. Each rod is identical in width and height — the only dimension that changes is length. This is what Maria Montessori called the "isolation of one quality," and it's one of the most brilliant features of her sensorial materials. By keeping color, texture, and thickness constant, the child's attention is drawn exclusively to differences in length.
The shortest rod measures exactly 10 centimeters (about 4 inches), and each successive rod increases by exactly 10 centimeters. The longest rod stretches a full meter — that's about 3.3 feet! When your child carries that longest rod across the room, holding it carefully with two hands, they are quite literally grasping the concept of "one meter" with their whole body. This is sensorial learning at its most powerful.
Here is the progression of the ten rods:
- Rod 1: 10 cm
- Rod 2: 20 cm
- Rod 3: 30 cm
- Rod 4: 40 cm
- Rod 5: 50 cm
- Rod 6: 60 cm
- Rod 7: 70 cm
- Rod 8: 80 cm
- Rod 9: 90 cm
- Rod 10: 100 cm (1 meter)
The constant difference of 10 centimeters between each rod is not arbitrary — it is mathematically precise and lays the groundwork for understanding the decimal system, the concept of "one more," and the fundamentals of measurement. The Red Rods are the direct precursor to the Number Rods (also called Red and Blue Rods), which add color alternation to introduce counting and quantity.
Ages
The Red Rods are typically introduced to children between 2½ and 6 years old. In most Montessori classrooms, the initial presentation happens around age 3, after the child has had some experience with the Knobbed Cylinders and possibly the Pink Tower. However, every child is different. Some younger children (around 2½) may be ready if they show strong interest in carrying objects, arranging things in order, and concentrating on a task for several minutes.
Older children in the 4-to-6 range will use the Red Rods in more advanced ways — measuring, combining them with other materials, and using them as a bridge to mathematical concepts. The beauty of Montessori materials is that they grow with the child, offering deeper learning at each stage of development.
Purpose and Aims of the Red Rods
Direct Aims
- Visual discrimination of length: The child learns to perceive, compare, and order differences in length — one of the key sensorial qualities Montessori identified
- Understanding of graduated series: Building the stair helps the child internalize the concept that objects can be ordered from smallest to largest (or longest to shortest) in a precise, regular progression
- Muscular perception of length: Carrying the rods — especially the longer ones — gives the child a physical, embodied experience of what "long" and "short" feel like
Indirect Aims
- Preparation for mathematics: The regular 10 cm increment introduces the child to the concept of a constant difference, the foundation of addition, and the decimal system. When the child later encounters the Number Rods, they will already understand the physical pattern — they just need to add the counting
- Preparation for measurement: The child is indirectly learning about units of measurement, comparison, and estimation
- Development of concentration: Building the stair requires sustained focus and careful judgment
- Refinement of order: The child's innate sense of order (so strong in the 3-to-6 age range) is nourished and refined
- Coordination and motor planning: Carrying a meter-long rod through a room full of furniture and classmates requires tremendous spatial awareness, balance, and coordination
- Independence and self-correction: The built-in control of error allows the child to work without constant adult supervision or correction
Materials Needed
To present this lesson at home, you'll need a set of Red Rods and a large floor mat or rug. The rods need to be placed on the floor — a table is usually too small, and the floor gives the child the full spatial experience of working with these impressive lengths.
Red Rods Sets
- Montessori Long Red Rods — Full 10-Piece Set — These are the full classroom-standard size, with rods graduated from 10 cm to 1 meter. If you have the space, this is the ideal choice because the full-size rods give your child the most powerful sensorial experience
- Kghios Montessori Red Rods — Compact Set — A smaller version with rods graduated from 5 cm to 50 cm, perfect for home use when space is limited. While not the traditional classroom size, these still teach the same concepts beautifully
You'll also want:
- A large floor mat or rug (at least 3 feet by 5 feet, though bigger is better)
- Enough floor space for the child to walk back and forth carrying the rods — ideally several feet between the shelf and the mat
Free Printouts
We've created free printable activities to complement your child's work with the Red Rods:
- Red Rods Printout (PDF) — A printable activity sheet featuring the Red Rods for practice, ordering, and coloring. Your child can cut out paper rods and arrange them in order, reinforcing the stair pattern
- Red Rods Answer Key (PDF) — The answer key for the Red Rods printout activity, so you can check your child's work together
These printouts are wonderful for travel, for days when you can't get the physical rods out, or as an additional extension after your child has worked with the concrete material. Remember, in Montessori, paper activities always come after hands-on work with the real materials — never as a replacement.
Presentation: Step-by-Step First Lesson
The presentation of the Red Rods is a beautiful thing to watch — and to give. Take your time. Move slowly and deliberately. Your child is absorbing not just the content of the lesson but your manner, your care, and your respect for the materials.
Before You Begin
The Red Rods should be stored horizontally on a low shelf, arranged in order from shortest (at the top) to longest (at the bottom), or in a rod stand. Make sure the work mat is already spread out on the floor, with plenty of space around it.
Step 1: Invite the Child
"Would you like to work with the Red Rods today? Come, I'll show you." Bring the child to the shelf where the rods are stored. This moment of invitation is important — it respects the child's autonomy and builds anticipation.
Step 2: Carry the Rods to the Mat
This is actually a critical part of the lesson, not just preparation! Show your child how to carry each rod with two hands — one hand near each end, held horizontally at the child's side. For the longest rods, the child may need to hold them carefully to avoid bumping into furniture or other people. This is a wonderful exercise in spatial awareness and grace of movement.
Carry the rods one at a time to the mat. Place them in a scattered, random arrangement on the mat — not in order. This is intentional: the child's task will be to find the order themselves.
Step 3: Build the Stair
Sit beside the mat so the child can see your hands clearly. Begin by visually scanning the rods and selecting the longest rod. Place it at the top (or left side) of the mat, aligned with the edge. Many children love starting with the longest rod — there's something deeply satisfying about it!
Now find the next longest rod. Place it directly below (or beside) the first, aligned on the left-hand side. This left-side alignment is important — it creates the characteristic "stair" pattern on the right side, making the graduated differences clearly visible.
Continue selecting rods from longest to shortest, placing each one carefully. As you place each rod, run your fingertips slowly along its length from one end to the other. This tactile gesture connects the visual impression to a muscular, kinesthetic impression — the brain literally "feels" the length through the hands.
When the stair is complete, pause and admire it together. The visual effect is striking — a perfect, even staircase descending from the longest rod to the shortest.
Step 4: Demonstrate the Constant Difference
Now comes a magical moment. Take the smallest rod (10 cm) and place it at the end of the second smallest rod. Show the child how the two rods together are exactly the same length as the third rod. Move the small rod up the stair, showing how it fills the "step" at each level. This demonstrates that the difference between any two adjacent rods is always exactly one smallest rod — the first concrete impression of "plus one" and the foundation of counting as successive addition.
Step 5: Invite the Child to Try
Gently mix the rods on the mat again (or have the child help you mix them) and invite the child to build the stair independently. Resist the urge to correct! The built-in control of error will guide the child. Simply observe, and offer encouragement with your calm, present attention.
Points of Interest and Control of Error
Points of Interest
Points of interest are the moments within the work that naturally capture the child's attention and motivation:
- The impressive length of the longest rod — children feel a real sense of accomplishment carrying it
- The satisfying visual pattern of the completed stair
- The discovery that the smallest rod "fits" perfectly in each step
- The tactile experience of running fingers along each rod's length
- The challenge of finding the right rod from the scattered group
Control of Error
The control of error is visual. When the stair is built correctly, the left side forms a perfectly straight line, and the right side forms a smooth, even staircase. If any rod is out of order, the stair pattern will be visibly disrupted — the steps will be uneven, with some too large and others too small. The child can see this without any adult pointing it out, which supports independence and self-correction.
Additionally, the child can verify the stair by placing the smallest rod in each successive step. If the smallest rod fits perfectly in every step, the stair is correct. If it's too long or too short for any step, a rod is out of place.
Exercises and Extensions
Once your child can confidently build the basic stair, a whole world of extensions opens up. These extensions deepen understanding, build new skills, and keep the material interesting over months and even years of use.
Exercise 1: Building the Stair from Shortest to Longest
After the child masters building from longest to shortest, invite them to try building from the shortest rod up. This reversal requires a different kind of visual judgment and reinforces the concept of graduated series in both directions.
Exercise 2: Building with a Starting Subset
As mentioned in the helpful hint tradition from Montessori classrooms: if your child finds all ten rods overwhelming at first, begin with every other rod (five rods total). Once they've mastered this simplified version, add in the remaining rods. This scaffolding technique honors the Montessori principle of isolation of difficulty.
Exercise 3: Measuring with the Shortest Rod
Give the child the shortest rod and invite them to "measure" each other rod. How many smallest rods long is the second rod? The third? This is a wonderful, concrete introduction to measurement and to counting with a unit. The child discovers that the second rod is "two small rods long," the third is "three small rods long," and so on — a direct preparation for the Number Rods.
Exercise 4: Maze and Design Patterns
Invite the child to use the rods to make shapes, mazes, letters, or designs on the floor. This creative extension develops spatial reasoning and allows the child to explore the rods in an open-ended way. Some children create elaborate railroad tracks, cityscapes, or abstract designs.
Exercise 5: Distance Placement
Place the rods on one shelf and the mat across the room. The child must carry each rod (one at a time) to the mat and build the stair. This extension emphasizes the gross motor and spatial awareness aspects of the work and adds an element of memory — the child must hold the image of the partially completed stair in mind as they walk back to the shelf.
Exercise 6: Combination with Other Materials
For an advanced child (typically age 4½ and older), invite them to combine the Red Rods with the Pink Tower and the Brown Stair. The child can compare how all three materials graduate differently — the Pink Tower changes in three dimensions, the Brown Stair in two dimensions, and the Red Rods in only one dimension. This is a powerful exercise in comparative thinking and mathematical reasoning.
Exercise 7: Bridge to the Number Rods
When the child is comfortable with the Red Rods and shows interest in counting, they are ready for the Number Rods. These are the same dimensions as the Red Rods but painted in alternating red and blue segments, each segment representing one unit. The transition from Red Rods to Number Rods is one of the most beautiful bridges in the Montessori curriculum — from pure sensorial experience to mathematical understanding.
Variations for Different Ages
For Younger Children (2½ to 3 years)
Younger children are often drawn to the Red Rods by their sheer size and beauty. At this age, focus on:
- The carrying — this alone is a rich exercise in coordination, spatial awareness, and independence
- Start with only 3 to 5 rods rather than all 10
- Allow plenty of time for free exploration before presenting the stair
- Keep the presentation very short and simple — demonstrate, then step back
- Don't worry about perfection. The process matters more than the product at this age
For Children in the Sweet Spot (3 to 4½ years)
This is the prime age for the Red Rods. The child's sensitive period for order is at its peak, and the satisfaction of building a perfect stair is deeply fulfilling. At this age:
- Present the full lesson with all 10 rods
- Introduce the language lesson (long, longer, longest / short, shorter, shortest)
- Show the constant difference with the smallest rod
- Allow repeated, independent work — many children will build the stair daily for weeks
For Older Children (4½ to 6 years)
Older children benefit from the extension exercises and cross-material connections:
- Measuring exercises with the smallest rod as a unit
- Combining with the Pink Tower and Brown Stair
- Transitioning to the Number Rods for counting and early arithmetic
- Creating patterns and designs with the rods
- Using the rods to measure objects in the environment ("This book is about 3 small rods long")
Language and Vocabulary: The Three Period Lesson
The Red Rods provide a perfect opportunity to introduce comparative and superlative language through the classic Montessori Three Period Lesson. The key vocabulary words are:
- Long, longer, longest
- Short, shorter, shortest
How to Give the Three Period Lesson with the Red Rods
Select three rods that are noticeably different in length — for example, the shortest, a middle rod, and the longest.
Period 1 — Naming (Introduction): Touch the longest rod and say, "This is the long rod." Touch the shortest and say, "This is the short rod." Keep it simple. Only introduce two contrasting terms at first.
Period 2 — Recognition: "Show me the long rod." "Can you point to the short rod?" "Please bring me the long rod." Mix up the requests and make it playful. This period builds understanding.
Period 3 — Recall: Point to a rod and ask, "What is this?" The child names it. This is the most challenging period — only move here when the child is confident with Period 2.
Once the child masters "long" and "short," introduce the comparative and superlative forms using three rods: "This is long. This is longer. This is the longest." And the reverse: "Short, shorter, shortest." This graduated vocabulary mirrors the graduated rods themselves — the language becomes embodied through the material.
These vocabulary lessons connect beautifully to the Color Tablets and Thermic Tablets lessons, where children also learn graded vocabulary through the Three Period Lesson format.
Cross-Material Connections
One of the most profound aspects of the Montessori Sensorial curriculum is how all the materials relate to and build upon each other. The Red Rods don't exist in isolation — they are part of a carefully designed web of learning.
The Pink Tower
The Pink Tower isolates differences in three dimensions — each cube differs from the next in length, width, and height simultaneously. The child who has worked with the Pink Tower and then encounters the Red Rods begins to understand that dimension can be isolated: you can change just one quality at a time. This is abstract thinking rooted in concrete experience.
The Brown Stair (Broad Stair)
The Brown Stair isolates differences in two dimensions — width and height change while length stays the same. Placed side by side with the Red Rods, children see the beautiful contrast: the Brown Stair prisms are all the same length but change in thickness, while the Red Rods are all the same thickness but change in length.
The Knobbed Cylinders
The Knobbed Cylinders introduce the child to graduated series in a self-correcting format (each cylinder fits only in its own hole). By the time a child moves to the Red Rods, they have already internalized the concept of ordering by size — the Red Rods extend this to a larger, more physical scale.
The Number Rods
The Number Rods are the mathematical twin of the Red Rods. They are identical in size but painted in alternating red and blue segments. Each segment represents one unit, making the quantity visible and countable. The child who has built the Red Rods stair many times already knows the pattern — the Number Rods simply add the language of numbers to what the child's hands and eyes have already learned.
Observation Tips for Parents
Observation is the parent's most powerful tool in Montessori. When your child works with the Red Rods, resist the urge to teach, correct, or direct. Instead, watch. Here's what to look for:
- How does your child carry the rods? Are they careful and deliberate? Do they navigate around obstacles? The long rods are a real challenge — watch how your child problem-solves
- How does your child select rods? Do they compare visually? Do they pick up rods and hold them side by side? Some children develop a systematic approach (always finding the longest remaining rod), while others work more intuitively
- Where does your child place rods? Do they align them on the left? Do they self-correct when the stair looks wrong? These are signs of developing visual discrimination
- How long does your child concentrate? The Red Rods are a long piece of work — carrying ten rods, building the stair, perhaps rebuilding it. Sustained concentration is one of the most important outcomes of Montessori work
- Does your child repeat the work? Repetition is the hallmark of deep learning. A child who builds the stair, mixes the rods, and builds it again (and again!) is in a period of intense growth
- Does your child show satisfaction? Watch for the quiet smile, the lingering gaze at the completed stair, the gentle running of fingers along the rods. These are signs that the work is meeting a deep internal need
If your child struggles or places rods out of order, don't correct them. The control of error is built into the material. If the child doesn't notice the error, it may mean they need more time with simpler materials, or that they need to work with fewer rods. Trust the process. Trust the child.
A Brief Word from Maria Montessori
Maria Montessori observed that the sensorial materials do not give children new impressions — rather, they help children organize and classify impressions they have already received from the environment. Your child has been perceiving differences in length since infancy. The Red Rods give those impressions a name, an order, and a system. As Montessori wrote, the materials are "a key to the world" — they help the child make sense of what they already sense.
This is why the Red Rods are so satisfying for children. The work isn't foreign or abstract — it resonates with something the child already knows. The stair "looks right" because the child's mind has been craving exactly this kind of order. When you see your child building that stair with focused joy, you are witnessing the beautiful alignment of inner need and outer material that is the hallmark of authentic Montessori education.
Summary and What Comes Next
The Red Rods are so much more than a set of sticks arranged by size. They are your child's first formal exploration of length as an isolated dimension. They prepare the hand, the eye, and the mind for mathematics. They develop concentration, coordination, and an appreciation for order and precision. And they are beautiful — which, in Montessori, is never an afterthought but always an invitation.
Key takeaways from today's lesson:
- The Red Rods isolate the single quality of length through 10 rods graduated from 10 cm to 1 meter
- Carrying the rods is part of the lesson — it develops coordination and spatial awareness
- The constant 10 cm difference between rods is the concrete foundation for understanding "one more" and the decimal system
- The Three Period Lesson with the Red Rods introduces the vocabulary of long/short and their comparative and superlative forms
- Extensions include measuring with the smallest rod, creating designs, and combining with other sensorial materials
- The Red Rods lead directly to the Number Rods, bridging sensorial experience and mathematical understanding
What comes next in our Montessori Lesson of the Day series? After mastering the Red Rods, your child is beautifully prepared for the Number Rods, which transform the sensorial experience of length into the mathematical experience of quantity and counting. We'll also continue exploring sensorial materials including the Color Tablets, which shift from dimension to color discrimination. Every lesson builds on the last, and every material connects to the whole — that's the genius of Montessori.
Enjoy watching your child build their stair today. That careful, focused work — carrying each rod, placing it just so, standing back to admire the result — is the work of a mind constructing itself. What a privilege it is to witness.
Happy teaching, Montessori families! 🌟