Lesson of the Day 100: Land and Water Forms — Montessori Geography's Hands-On Introduction to Landforms
Published on: May 26, 2026
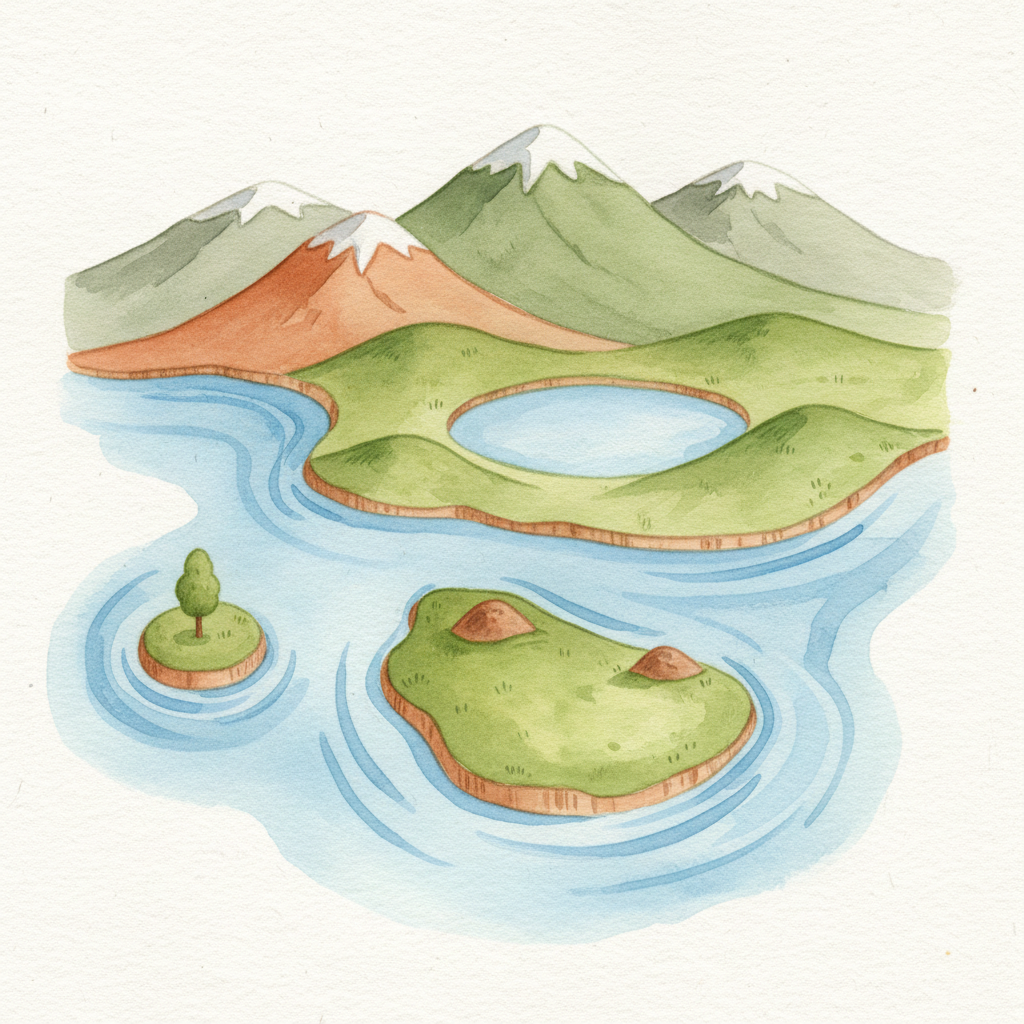
"The land is where our roots are. Children must be taught to feel and live in harmony with the Earth." — Maria Montessori
Welcome to Lesson of the Day 100 — a milestone worth celebrating! And what better way to mark this moment than by stepping into one of Montessori education's most beloved — and most beautiful — areas of study: Geography. This is our very first Geography-focused Lesson of the Day, and it introduces a material that has captivated young children for over a century — the Land and Water Form Trays.
Picture this: your child stands before a small blue tray, pours water from a tiny pitcher, and watches as the water fills in around a mound of clay or molded plastic — and suddenly, right there in their hands, is an island. Not a picture of an island. Not the word "island" printed on a flashcard. An actual island — land surrounded by water on all sides — small enough to hold, turn, and examine from every angle. Then they look at the companion tray, where the same shape has been reversed, and they see a lake — a body of water surrounded by land. In one breathtaking, hands-on moment, your child grasps a geographic concept that textbooks struggle to convey in paragraphs. That is the magic of Montessori geography.
Land and Water Forms are among the first geography materials presented in the Montessori classroom, typically between ages three and six. They teach children the names and characteristics of Earth's major landforms — mountains, valleys, peninsulas, bays, isthmuses, straits, and more — through sensorial, tactile experiences. The child doesn't just learn about the Earth. They build it, pour water onto it, and feel the difference between land and water with their own hands. And from this concrete, physical foundation, a lifelong love of geography — and a deep sense of connection to our planet — begins to grow.
🌍 Why Land and Water Forms Matter in Montessori
Geography, in the Montessori tradition, is far more than memorizing capitals and coloring maps. Maria Montessori understood geography as the study of human interaction with the physical environment — how people live on the Earth, how landscapes shape cultures, and how all living things are interconnected across continents and oceans. She believed that when children truly understand the physical world — its mountains, its rivers, its coastlines — they develop a profound respect for the planet and for the diverse cultures that call it home.
A child's first introduction to geography begins at home — through their native culture, the landscape outside their window, the foods on their table. But Montessori geography deliberately expands that circle outward, inviting children to explore environments and cultures far beyond their own. The Land and Water Forms are the perfect starting point because they give children a shared vocabulary — a universal set of terms for describing the Earth's surface that applies whether you're looking at the coast of Italy, the Great Lakes of North America, or the Isthmus of Panama.
And here's what makes this material so ingeniously Montessori: the forms are presented in pairs of opposites. An island (land surrounded by water) is paired with a lake (water surrounded by land). A peninsula (land jutting into water, surrounded on three sides) is paired with a bay or gulf (water jutting into land, surrounded on three sides). An isthmus (a narrow strip of land connecting two larger landmasses) is paired with a strait (a narrow strip of water connecting two larger bodies of water). This pairing isn't just clever — it's deeply educational. By seeing how the same shape, reversed, creates two entirely different geographic features, children develop relational thinking. They begin to understand that land and water define each other — that geography is about relationships, not isolated facts.
🎒 Materials You'll Need
- Montessori Land & Water Form Trays — These are small trays (typically blue) with molded forms that show landform shapes. When water is poured in, the geographic feature becomes immediately visible and tangible. The classic first set includes island/lake, peninsula/bay (gulf), and isthmus/strait.
- Montessori Land and Water Form Cards — Sandpaper or textured nomenclature cards that show the land and water forms in a tactile format, reinforcing the sensorial learning.
- A small pitcher of water — For pouring into the trays. The act of pouring is itself a practical life exercise — your child practices fine motor control while learning geography.
- A sponge and small towel — For cleanup. In Montessori, caring for the materials is part of the lesson.
- Modeling clay (optional but wonderful) — For extension activities where your child sculpts their own landforms in a shallow baking dish or tray.
- A work mat or rug — To define the workspace and protect surfaces from water.
- Nomenclature cards (3-part cards) — Printed cards with picture, label, and definition for each landform. See our free printables below!
- A globe or world map — For pointing out real-world examples of each landform. If you've already been working with Puzzle Maps, this is a perfect time to pull them out again.
🔎 Free Printable Resources
We've created a comprehensive set of free printable nomenclature cards to support your Land and Water Forms lessons. These follow the Montessori three-part card format — picture with label, picture without label, and label only — so your child can progress from guided learning to independent matching:
- 📄 Landform Nomenclature Cards Set 1 — Includes peninsula, bay, lake, island, isthmus, and strait with pictures and labels.
- 📄 Landform Nomenclature Cards Set 2 — Includes mountain, hill, plateau, plain, and valley with pictures and labels.
- 📄 Landform Matching Cards Set 1 — Pictures only (no labels) for independent matching practice.
- 📄 Landform Matching Cards Set 2 — Pictures only (no labels) for the second set of landforms.
- 📄 Landform Name Cards — Labels only for matching to pictures.
- 📄 Geography Nomenclature Cards Set 1 — Covers larger concepts: Earth's layers, ocean, land, and continents.
- 📄 Geography Nomenclature Cards Set 2 — Matching cards for the larger geography concepts.
🌊 Activity 1: First Presentation — The Land and Water Form Trays
This is the core lesson — your child's first sensorial encounter with landforms. Choose one pair for the first presentation. The classic starting pair is island and lake, because these are the simplest and most visually striking opposites.
- Invite your child. "I have something really special to show you today. Would you like to learn about how land and water create shapes on the Earth?" Carry the two trays to the work area together — let your child carry one if they're able.
- Present the island tray. Place the island tray in front of your child. Run your finger slowly around the raised landform in the center. Say clearly and simply: "This is an island. An island is land surrounded by water on all sides." Now pick up the small pitcher and slowly pour water into the tray. Watch your child's face as the water fills in around the raised form — this is almost always a moment of pure wonder. The abstract concept of "island" has just become real.
- Let your child touch. Invite your child to trace the land with one finger and touch the water with another. "Feel the land here — and the water all around it. Land surrounded by water. An island."
- Present the lake tray. Now place the lake tray beside the island tray. This tray has the opposite configuration — a depression in the center where water collects, surrounded by raised land. Pour water into the depression. "This is a lake. A lake is water surrounded by land on all sides."
- Compare the pair. Place both trays side by side. "Look — the island has land in the middle with water around it. The lake has water in the middle with land around it. They are opposites!" Let your child pour the water back and forth, refilling each tray, examining the shapes from different angles.
- Invite repetition. Your child will likely want to pour and re-pour the water many times. This is wonderful — each repetition deepens understanding. When they seem satisfied, show them how to sponge the trays dry and return the materials to the shelf.
Over the following days and weeks, introduce the remaining pairs — peninsula and bay, then isthmus and strait — one pair at a time, using the same slow, deliberate presentation. Never rush to introduce the next pair. Let your child return to each set repeatedly until they can name the forms independently.
🗂️ Activity 2: Three-Period Lesson with Nomenclature Cards
Once your child is familiar with the physical trays, introduce the nomenclature cards using the classic Montessori three-period lesson. This bridges the gap between the concrete, sensorial experience and the abstract — the printed word.
Period 1 — "This is…"
Select three nomenclature cards — for instance, island, peninsula, and isthmus. Place each card on the work rug with its label below and its definition card beneath that. Point to each one and name it clearly: "This is an island." "This is a peninsula." "This is an isthmus." Read the definition aloud — or let your child read it if they're able. Keep your voice calm and unhurried.
Period 2 — "Show me…"
Now mix the cards slightly and ask your child to identify them: "Can you show me the peninsula?" "Point to the island." "Which one is the isthmus?" This period can be playful — "Can you put the island card on your head?" — as long as your child is successfully identifying each form. If they hesitate or make an error, simply go back to Period 1. No corrections, no pressure — just gentle re-presentation.
Period 3 — "What is this?"
Point to a card and ask: "What is this?" This requires your child to recall and produce the name independently — the most challenging step. Only move to Period 3 when your child is consistently successful in Period 2. Many children will reach this stage within a few presentations; others may take a week or more. Both timelines are perfectly normal.
Always allow your child to take over the exercise once they understand the process. As Montessori reminds us — the goal is independence. If your child wants to lay out the cards, match the pictures to the labels, and read the definitions on their own, step back and let them work.
🏔️ Activity 3: Modeling Clay Landforms
This extension is a favorite with children — and it's one that brings the lesson fully into the child's creative hands.
- Provide a shallow baking dish or waterproof tray and a lump of modeling clay (or air-dry clay for a more permanent creation).
- Ask your child to choose a landform to build. "Would you like to make a mountain? A peninsula? A valley?"
- Let them sculpt the landform in the tray, then slowly pour water around it to reveal the geographic feature.
- Encourage them to label their creation with a small flag or card.
- For older children — ages five and six — challenge them to build an entire landscape in one large tray: a mountain range with a valley between the peaks, a peninsula extending into a bay, an island offshore. This kind of integrated modeling develops spatial reasoning and geographic imagination in remarkable ways.
🌎 Extensions and Variations
- Real-world connections. Anytime you travel — whether it's a summer road trip, a visit to a lake, or simply looking out over a valley — point out landforms and name them. "Look — that's a peninsula! Remember our tray?" Children who have worked with the Land and Water Forms will start spotting geographic features everywhere, which is exactly the point.
- Globe and map matching. After presenting each landform, find real-world examples on a globe or map. "Florida is a peninsula. Can you find it?" "Lake Michigan is a lake — water surrounded by land." If you've already explored Puzzle Maps, pull them out and connect the two lessons.
- Larger geographic concepts. For children ready to expand, introduce the concepts of ocean, continent, and the layers of the Earth using our Geography Nomenclature Cards. The layers of the Earth — core, mantle, and crust — fascinate children and provide a natural bridge to geology and earth science.
- Art and drawing. Invite your child to draw or paint their own landforms, labeling each one. Watercolor is especially lovely for this — children can paint the water blue and the land green or brown, creating their own geographic illustrations.
- Landform book. Staple together a small booklet. On each page, your child draws a landform and writes (or dictates) its name and definition. By the time they've completed all eleven forms, they have a geography reference book they made themselves.
- Cooking geography. Make a "landform cake" — a sheet cake decorated with frosting to show an island, a peninsula, a mountain range. Use blue gel frosting for water and green for land. Children remember what they eat!
👶 Age Recommendations
Ages 3–4: Begin with the physical trays only — one pair at a time. Focus on the sensorial experience of pouring water and feeling the land and water. Introduce the names through casual conversation: "You made an island!" Nomenclature cards can be introduced toward age four, but keep sessions short — two or three cards at a time.
Ages 4–5: The full three-period lesson with nomenclature cards. Introduce all the landform pairs over several weeks. Add clay modeling and real-world map matching. This is the age when many children become absolutely fascinated with geography and will ask to do this work daily.
Ages 5–6: Extend into the larger geographic concepts — continents, oceans, layers of the Earth. Encourage independent research: "What's the largest island in the world? Can you find it on the globe?" Introduce the landform book project. Children at this age can also begin exploring cultural geography — how people who live on islands, in valleys, or on plains have developed different ways of life.
🎯 What's Next?
Congratulations — you've reached Lesson of the Day 100! From practical life to sensorial work, from mathematics to language, and now to geography, you've been building a rich, interconnected web of learning for your child. And that's exactly what Montessori education is — not a collection of isolated subjects, but a cosmic curriculum where everything connects to everything else.
If you haven't already explored our Puzzle Maps lesson (LOTD 66), that's a natural next step — your child can place continent pieces on the world map and connect each one to the landforms they've been studying. From here, the world — quite literally — opens up: cultural studies, animal habitats, climate and weather, the story of how mountains form and rivers carve valleys over millions of years.
Your child touched clay, poured water, and saw an island appear. That small, quiet moment — hands in water, eyes wide with understanding — is where a love of the world begins. And that love, once kindled, lasts a lifetime.
Happy exploring — and happy 100th Lesson of the Day! 🌍