Lesson of the Day 3
Published on: June 30, 2007
"The child who concentrates is immensely happy." — Maria Montessori
Today's learning adventure is brought to you by the letter C — featuring calendars, caterpillars, and clouds! This rich lesson day covers practical life skills, sensorial exploration, science experiments with water and air, math readiness with red rods and number rods, art projects, cooking, and the introduction of the letter C. There's something here for every curious learner!
🎒 Materials You'll Need
- 3 pieces of poster board (for the calendar)
- Stick-on Velcro dots (precut, from any craft store)
- Marker pen, scissors
- Small colored candies (M&Ms, Skittles, or jellybeans) for sorting
- Clean Styrofoam egg carton or muffin tin, large bowl, tray
- Nesting/stacking cups (or measuring cups/bowls that fit inside each other)
- 8 small jars (baby food jars or spice jars) for temperature bottles
- Plastic straw, food coloring, paper
- Yard sticks or long dowels, red and blue paint (for red rods and number rods)
- 10 plastic eggs, 55 small counters (pennies, candies, chips)
- Sand in a square cake pan (for sand letter tracing)
- Egg cartons, paint, collage materials, pipe cleaners, googly eyes (for caterpillar craft)
- Plain paper, tempera or finger paint, scissors (for ink blot butterfly)
- Cotton balls, blue construction paper, glue
- Powdered Ivory soap flakes, liquid starch or cornstarch
- Frozen bread dough, decorating candy (for caterpillar bread)
- Whipped topping, instant pudding, milk, small jars (for cloud surprise)
- 👉 Magnetic Calendar Chart on Amazon
- 👉 Sorting Toys Set on Amazon
🔎 Free Printouts
Use these free printable resources to extend the lesson:
- 📄 Calendar Printout — A ready-made calendar template
- 📄 Calendar Template B — An alternate calendar layout
- 📄 Calendar Movables — Cut-out numbers and pieces for your calendar
- 📄 Calendar Days — Days of the week cards
- 📄 Calendar Days Key
- 📄 Calendar — Spanish — Days and months in Spanish
- 📄 Counting 1–10 — Number cards for counting practice
- 📄 Butterfly Life Cycle Cards — Complement your caterpillar activities
- 📄 Butterfly Nomenclature Cards
- 📄 Color Nomenclature Cards — Great for the sorting activity
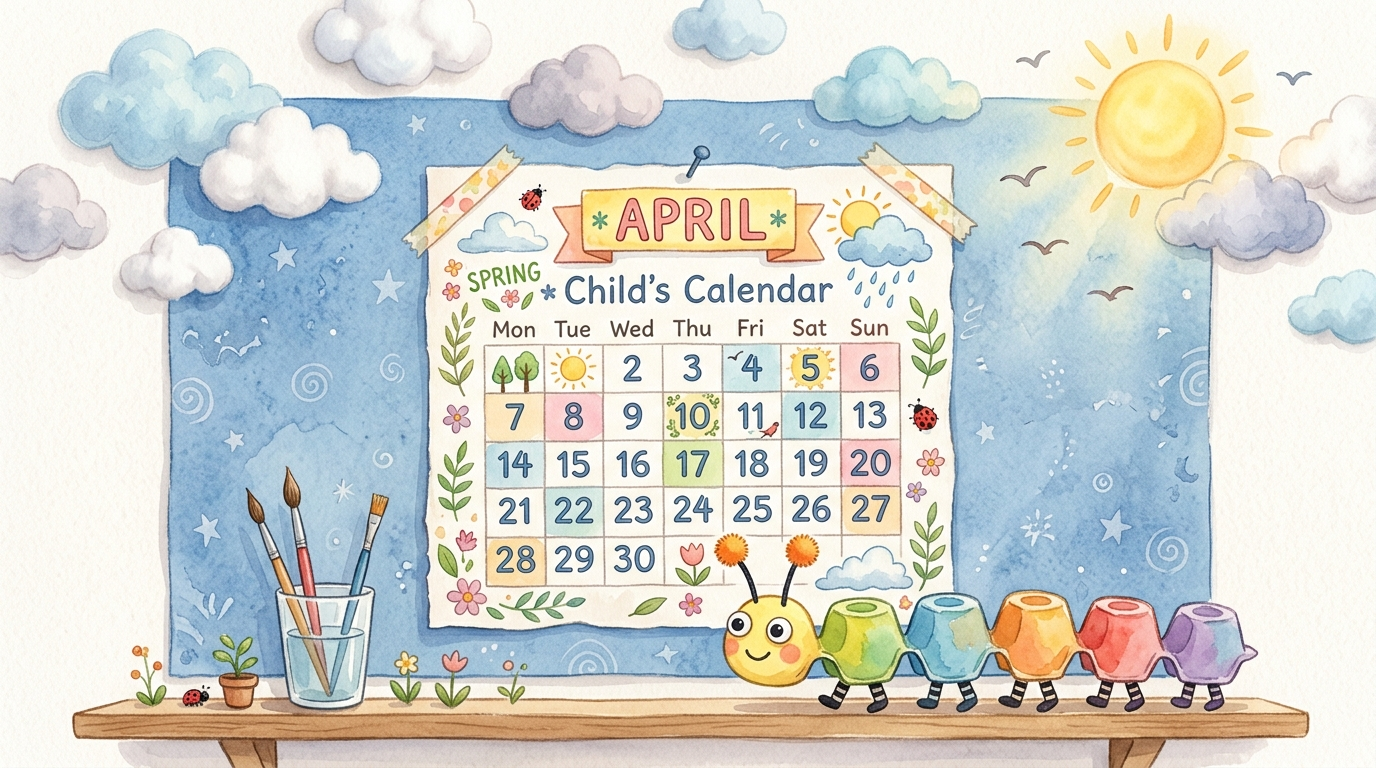
📅 Part 1: Calendar Time
A homemade calendar is a wonderful daily ritual that teaches counting, days of the week, months of the year, and even weather observation — all in one activity!
Making Your Calendar
- Main calendar board: On a plain poster board, divide the lower three-quarters into 31 squares arranged in 5 rows of 7. At the top of each column, print the days of the week starting with Sunday.
- Number cards: On a second poster board, make squares of the same size and cut them out. Print the numbers 1 through 31 on them. Attach Velcro to the blank squares on the main calendar and the corresponding Velcro to the backs of each number card.
- Month labels: On the third poster board, write the names of all 12 months. Attach Velcro to the top of the calendar and to the back of each month name.
Daily Calendar Lesson
- Month: Each month, place the correct month name on the calendar. Say the months of the year together with your child until you reach the current month.
- Day number: Each day, place the correct number. Count together from one to the new number. Let your child help according to ability — take turns!
- Day of the week: Point to the days of the week to find which day it is. Sing the days of the week in a sing-song voice — starting low and ending high, with a slight emphasis on "day": Sunday, Monday, Tuesday, Wednesday, Thursday, Friday, Saturday!
- Weather: Make simple weather indicators (a sun, rain cloud with raindrops, snow cloud, sun with cloud, a wind sock) and attach the matching one each day. Take turns being the "weather person." You can also mark special events like birthdays, holidays, and family fun days.
🧹 Part 2: Life Skills — Sorting Beads (Colors)
Basic Color Sorting
Place a muffin tin or clean egg carton on a tray or small area rug. Mix all the colored candies in a large bowl. Slowly show your child how to pick up one candy at a time and place it into an empty section. Your child then sorts by color, placing each color into its own section.
This activity is wonderful for color discrimination, fine motor skills, and matching — all of which prepare for reading and math readiness.
Advanced Sorting: Sorting by Touch
Replace the candies with different colored buttons. Each color group should have a distinctive shape or size. Have your child start by placing one of each different color button into a section. Then, blindfold your child (or have them close their eyes) and sort the buttons by feel alone. The control of error is that similarly colored buttons should end up in the same section.
🎨 Part 3: Sensorial Activities (Ages 2 and Up)
Nesting Cups — Pink Tower & Cylinder Exploration
Nesting cups or stacking blocks work beautifully as a homemade version of the Montessori Pink Tower and Cylinder exercises. You can find nesting toys in infant sections of stores, or simply use measuring cups or bowls that fit inside each other.
- Stacking: Have your child stack the nesting cups from largest to smallest. If the order is wrong, the stack will topple — a built-in control of error!
- Nesting: Place the cups inside each other from largest to smallest for a lesson in gradation.
- Grading in a line: Take out all the cups and arrange them in a line from smallest to largest (or largest to smallest).
- Weight exploration: Fill each container with rice, salt, sugar, or water and let your child feel the weight of each. Which is heaviest? Which is lightest? For an advanced lesson, ask your child to order them from heaviest to lightest.
Tip: If this is too challenging at first, use every other cup. Add the remaining cups as your child masters the lesson. Always let your child repeat the activity as much as they wish!
Temperature Water Bottles
This exercise develops the sense of touch and introduces the concept that water has various temperatures — leading to scientific understanding of weather phenomena like rain, snow, sleet, and hail.
Materials: 8 small jars (baby food or spice jars), water at various temperatures.
Method: Fill pairs of jars with matching temperature water, ranging from icy cold to very warm (never burning hot!).
- Have your child feel the jars and pair them by temperature.
- Next, try pairing with a blindfold or eyes closed.
- Finally, grade the pairs from coldest to hottest.
🌧️ Part 4: States of Water & Cloud Science
Ice, Water, and Steam Demonstration
This is a beautiful science lesson that grows naturally from the temperature bottles activity.
- In a hot pan, begin melting a tray of ice cubes. Show your child the ice and explain that ice is solid water. Let your child feel a solid ice cube.
- As the ice melts, show your child that the melted water is the liquid form of water. Let your child feel a spoonful of cool liquid water.
- As the water boils and steams, explain that steam is the gas form of water.
- Hold a cool lid (chilled in the freezer for a few minutes) at an angle over the steam. Soon, "raindrops" will form and drip off the lid — the warm steam condenses into water drops!
After the demonstration, ask your child to show you solid water, liquid water, and water in a gas state. Then discuss: Rain is liquid water. Snow and hail are solid water. Clouds are a gas form of water — like huge, gaseous lakes floating in the sky!
Cloud Observation & Art
Go outside and observe different types of clouds. What interesting shapes do they look like?
- Cumulus — big, fluffy, and puffy
- Stratus — flat and long
- Cirrus — curly and feathery
Cotton Ball Cloud Art: Make different shaped clouds using cotton balls and paste them on blue construction paper.
Fluffy Soap Cloud Paint: For a wonderful texture experience, try this recipe:
- 1 cup powdered soap (Ivory Soap Flakes)
- ½ cup liquid starch (or 2 tablespoons cornstarch cooked in ½ cup water)
- Water — enough to make the mixture spreadable
Mix the starch and soap until soft and moist. Add water to reach a spreadable texture. Let your child use their hands or the curved back of a spoon to make clouds on paper. Create interesting textures with a fork or toothpick. When dry, spray with hairspray to prevent chipping.
🔬 Part 5: Science Experiments
Sink the Boat — Water Displacement
In a sink or large bowl of water, float a plastic container (like a recycled food container). Have your child add similar objects — screws, coins, or nails — one at a time, counting together. How many objects make the cup sink?
Why does this happen? The empty container's weight displaces more volume than water. As objects are added, the container sinks lower because it becomes closer to the weight of water. When it finally sinks, the container is slightly heavier than the same volume of water.
Blow Painting — Air Pressure Art
Give your child a plastic straw. Have them blow through it onto their hand. What do they feel? Moving air!
Put a few drops of different colored paint or food coloring on paper and let your child blow through the straw, using air pressure to create a painting.
Talk about: What is moving air? Wind! Make a point to observe the velocity of wind each day — you can incorporate this into the daily calendar weather activity.
📏 Part 6: Math Readiness
Red Rods
The Red Rods are the first step for math readiness in the Montessori method.
Make your own: Buy inexpensive plain yardsticks (or get free ones). You'll need six sticks total. If using a yardstick instead of meters, use approximately 3.6 inches per unit length for each rod to vary. Paint all 10 rods red. You can also use long dowels or long craft sticks.
Number Rods
Make these the same as the red rods — you can use the back side! Color the sections alternating red and blue:
- 1st rod: all red (1 section)
- 2nd rod: red-blue (2 sections)
- 3rd rod: red-blue-red (3 sections)
- 4th rod: red-blue-red-blue (4 sections)
- Continue this pattern through 10 rods
Make number cards 1 through 10 and match them to the rods.
Counting Eggs (Advanced Math)
When your child has mastered counting and can recognize the numbers 1 through 10, try this exciting variation:
Materials: 10 plastic eggs (the kind that opens in the middle), 55 small counters (pennies, candies, poker chips), numbers 1–10 written on paper slips to fit inside the eggs.
Method: Place a numbered paper inside each egg (fold it several times for excitement!). On a floor mat, your child picks an egg, opens it to reveal the number, and places the correct number of counters next to it.
If this is challenging, start with numbers 1–5 or even 1–3, then add more as your child masters the lesson. You can also add higher numbers and even introduce 0. Store everything in a basket and let your child repeat as often as they wish!
🚶 Part 7: Group Activity — Walking the Line
Beginning Exercises
- Have each child sit on the line
- Sit next to the line
- Place an object on the line
- Crawl on the line — wonderful for eye-hand coordination!
Advanced Exercises
- Walk the line backwards
- Walk the line with a blindfold
- Walk the line with a light book balanced on your head
✂️ Part 8: Art Projects
Cutting a Curved Line
Materials: Safety scissors, pencil, crayons, plain stiff paper.
Down the middle of the page, draw a line that curves out to a half-circle in the center. Let your child cut along the shape with safety scissors. They can color and decorate it and turn it into a hat! If cutting a curve is too difficult, start with cutting a straight line first.
Egg Carton Caterpillar
Materials: Egg cartons, paint, collage materials (yarn, cloth, colored paper), toothpicks or pipe cleaners, googly eyes.
- Cut long strips from the egg carton.
- Let your child paint or paste collage pieces on the caterpillar.
- Add toothpicks, straws, or pipe cleaners for legs and antennae.
- Glue on googly eyes for a finishing touch!
Ink Blot Butterfly
Materials: Plain paper folded in half (cut or traced into a butterfly shape), tempera or finger paint in primary colors (yellow, red, blue), scissors.
- On one side of the butterfly paper, dab various paint colors.
- Fold the paper closed.
- Gently rub the folded paper.
- Open — and discover a beautiful symmetrical butterfly!
🔤 Part 9: Introduce the Letter C
Three-Period Lesson for "C"
- This is "c": Show your child the letter "c" and say, "This is c." Tell your child the sound it makes — the hard "c" sound, like in cat.
- Show me "c": Ask your child to point to the letter "c."
- What is this? Point to the letter "c" and ask, "What letter is this?"
If your child has difficulty with both the letter name and sound, just introduce the sound of the letter first.
Letter C Song
To reinforce the new letter, let your child point to it and sing to the melody of "Row, Row, Row Your Boat":
"K, k, k, the crunchy sound,
'C' makes a crunchy sound.
K, k, k, k,
'K' makes a crunchy sound."
If this comes easily, add more hard "c" words: cup, caterpillar, cat!
Review Letters A, B, and C
Put letters a, b, and c together. Ask your child to find each letter, then ask the name of each letter. Lastly, ask your child to say the sound. Don't worry if you need to go back to earlier steps — learning is a journey!
Sand Letter Tracing
Put sand in a square cake pan or box. Help your child trace the lowercase "c" while saying its sound. For a delicious variation, try chocolate pudding on shiny butcher paper — let your child have fun tracing letters in this new medium!
🍳 Part 10: ABC Cooking
Caterpillar Bread
A quick and fun recipe using frozen bread dough!
You'll need: Bread dough, licorice whips, jelly beans, chocolate chips, raisins, nuts, sugar and candy sprinkles.
- Divide the dough into 3 or 4 sections (depending on how many children are participating).
- Have each child roll out the dough into a long cylinder, about 10–12 inches.
- Using a plastic serrated knife, cut the caterpillar into 4 or 5 sections.
- Place the sections in an interesting design (head up, curved around) on a greased cookie sheet.
- Decorate: raisins for eyes, licorice whips for antennae and legs, jelly beans and candies for color. Caterpillars are wild-looking in nature, so have fun!
- Bake at 350°F for about 20 minutes or until done. (Your bread is done when you lightly thump it and it makes a hollow sound.)
Cloud Surprise
You'll need: Whipped topping, instant pudding, milk, small jars with lids, clear bowls or cups.
- Combine milk and pudding mix, and whisk well. Divide into small jars and cover tightly.
- Let your child shake the pudding until thick!
- In a clear bowl or cup, scoop whipped topping to cover the bottom.
- Spoon in the shaken pudding, then cover with more whipped topping.
- Enjoy eating your "cloud"!
📚 Part 11: Reading Aloud Corner
Here are some wonderful books about caterpillars, rain, and weather:
- Percival the Plain Little Caterpillar by Helen Brawley
- Clara Caterpillar by Pamela Duncan Edwards
- The Very Hungry Caterpillar by Eric Carle
- Caterpillar, Caterpillar by Vivian French
- Give Yourself to the Rain: Poems for the Very Young by Margaret Wise
- Rain by Manya Stojic
- Can It Rain Cats and Dogs? Questions and Answers About Weather by Melvin and Gilda Berger
- Come On, Rain! by Karen Hesse
- Why Does It Rain? by Marian B. Jacobs
🇪🇸 Part 12: Spanish Corner
This week we add a new word: mano (hand)!
- Point to your child's hand and say, "mano."
- Ask your child, "Where is your mano?"
- Point to your child's hand and ask, "What is this called in Spanish?"
Continue the three-period lesson for all three words learned so far: agua (water), boca (mouth), and mano (hand). Use all three together and have your child point to each when named.
Spanish-language children's programs like Sesame Street offer wonderful exposure to the language and create a prepared Spanish environment at home. 🌟
🏡 Family Project
This week's family project is making a sand candle and rain gauge — a perfect complement to our weather and cloud explorations!