Lesson of the Day 27: Dinosaurs and Rocks
Published on: March 31, 2026
Dinosaurs and Rocks
...d, d, d the dinosaur sound, D makes a dinosaur sound!
Dinosaurs and rocks are a natural pairing that captivates children of all ages. Preschoolers love the wonder of giant creatures that once roamed the earth, while elementary students can connect them to the Montessori Great Lessons — particularly the First Great Lesson about the formation of the universe and earth. Rocks and minerals tell the story of our planet's history, and dinosaur fossils are some of the most exciting chapters.
Recommended Materials
These hands-on materials bring the lesson to life at home or in the classroom:
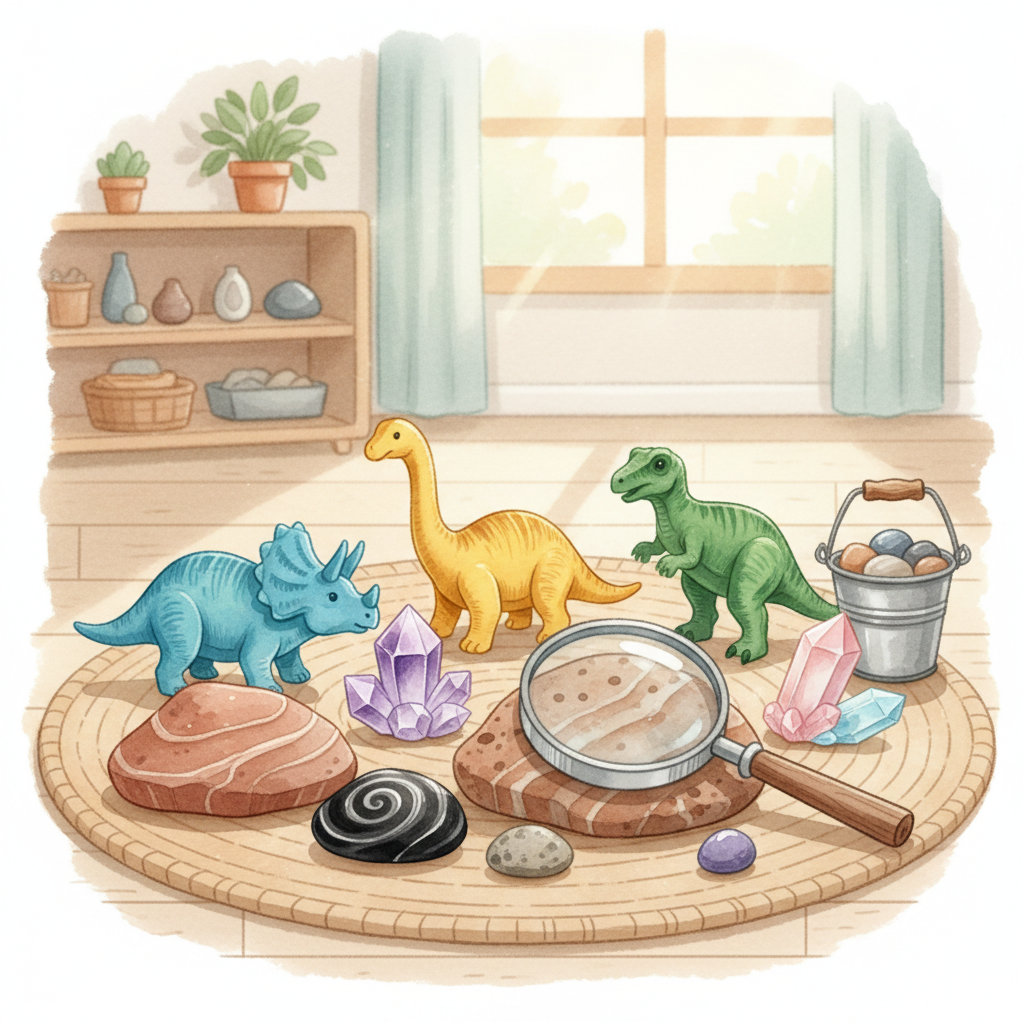
- DINOSAURS ROCK Mineral & Gemstone Sorting Kit — A huge assortment of rocks, minerals, and gemstones perfect for sorting, classifying, and hands-on geology exploration. Great for do-it-yourself panning activities.
- Dan&Darci Rock Collection for Kids — Over 250 rocks, gemstones, crystals, and genuine fossils. A wonderful earth science starter kit with identification guides.
- Montessori Dinosaur Figure Animal Match — 12 realistic Safari LTD miniature dinosaur figurines with laminated matching cards. Perfect for nomenclature card activities and the Dinosaur Washing Tray.
Rock Hounding: A Geology Adventure
You can find rocks almost anywhere — and rock hounding is a wonderful hobby that probably starts from the first shiny rock a child picks up! Here's what to pack in your backpack for a rock hunting adventure:
- A compass — Kids love to see the direction they are going. A compass is a great tool for using a map and finding your way.
- A magnifying glass (10x) — You can see the crystal formations of a rock much easier with magnification. Find one small enough to put in your pocket or hang around your neck.
- A small garden trowel — For digging out specimens.
- A small piece of tile — Use the plain backside to rub the rock and find out its true color. Use a color chart to match the rocks.
- Small containers — Empty egg cartons secured with rubber bands, or newspapers to wrap the rocks.
- Tags and pencil — Mark each rock with a number (1 through 10). Note on a map or pad where each rock was found, and research the geology of that location.
- A small bottle of vinegar with an eyedropper — Put a drop on each specimen. If it fizzes, the rock is made of base material, usually calcite or limestone!
- Water — To drink and to rinse the dust off your rocks.
Crystal Garden Experiment
Growing crystals is a fascinating way to explore geology. With adult supervision, children can create their own crystal garden and observe crystal formation over several days.
Materials:
- Some coal or rocks
- A clear shallow glass bowl
- A small bowl for mixing
- 6 tablespoons of bluing (found in the detergent aisle)
- 6 tablespoons of salt
- 6 tablespoons of water
- 6 tablespoons of ammonia
- Various food coloring
Steps:
- Put the coal or rocks in the bottom of the glass bowl.
- Mix the bluing, salt, water, and ammonia in the small bowl.
- Pour the mixture over the rocks or coal.
- Add a few drops of different food coloring in different areas.
- After a few hours, crystals will start to form. They will grow over the next few days — very colorful and interesting for observation!
- Use a magnifying glass to help your child see the symmetry in the crystal structure.
Science Journal: On note cards, make observations about:
- How long did it take before the first crystal appeared?
- How many crystals appeared the second day compared to the first?
- When did the crystals stop forming?
- Draw a picture of a crystal.
What is a crystal? It is a type of rock with a special form — made from even shapes that repeat themselves. Snowflakes are crystals too!
Practical Life: The Dinosaur Washing Tray
This is a favorite Montessori practical life activity for dinosaur fans! It builds concentration, coordination, and care for materials.
What you will need:
- One large dinosaur figure
- A tray or shallow box
- A bowl for water
- A jug of water (put in just enough so the bowl won't overflow)
- A face cloth or wash cloth
- Cotton swabs
- A child's soft, new toothbrush
Presentation: Put all items on the tray and bring to the table. Show how to slowly fill the bowl about one-third with water. Take the brush and slowly clean the dinosaur model. Dry with the cloth. Use a cotton swab to dry smaller areas — claws, teeth, and head. Put everything away when finished.
Dinosaur Songs and Music
Dinosaur songs and finger plays are a great way to introduce music to your dinosaur theme. Clapping, hand gestures, and dramatic play enhance your child's language and comprehension skills. Try singing simple dinosaur songs while stomping like a T-Rex or swooping like a Pteranodon!
Dinosaur Cards and Matching Games
For very young children (18 months to 2 years), you can buy plastic dinosaurs and match them with pictures of the same dinosaurs. Older children can make their own nomenclature cards or three-part cards.
How to make dinosaur cards: Print or draw pictures of different dinosaurs. Label each one with its name. You can use these for:
- Matching — Match the plastic figure to the correct card
- Reading — Read the dinosaur name on the card
- Spelling — Use a moveable alphabet to spell dinosaur names
- Memory Game — Mix up and spread out pairs of cards face up, then turn them face down. Flip one card and try to find its match. Play in teams for more fun!
Dinosaur Science and Math
Dinosaur Footprints: Make dinosaur footprint cutouts and number them. Spread them out on the floor — children can walk on them in numerical order or collect them in sequence. This combines gross motor skills with number recognition.
Dinosaur Math: Create simple addition and subtraction problems with dinosaur themes: "If 5 dinosaurs were eating plants and 2 more came along, how many dinosaurs are there now?" Use plastic dinosaur figures as manipulatives to solve the problems — very Montessori!
Dinosaur Dig
Create your own fossil dig! This is a wonderful outdoor (or indoor) activity that combines science with sensory exploration.
Setup: Put sand in a large container or plastic pool and bury "fossils" for children to discover.
What you need:
- Sand or dirt
- Plastic shovels
- Buckets for extra sand
- Old paint brushes to brush off the "fossils"
- A tray to display discoveries
Fossils to bury: You can make fossils from pasta pressed into clay, use store-bought dinosaur bones, or hide plastic dinosaur figures. For older children, make the dig more interesting by burying modern items alongside ancient ones (rocks, shells, rubber bands, paper clips) and let the children decide what belongs to the dinosaur era and what doesn't!
Are Dinosaurs Alive Today?
This is a fascinating discussion topic for older children: What happened to the dinosaurs? Many scientists believe that today's birds are the descendants of dinosaurs. The saltwater crocodile is often called a "living dinosaur" because crocodilians have existed for over 200 million years. You never know where you might see a dinosaur — look up at the birds in your yard!
See also: Lesson 26: The Colored Tablets for more sensorial exploration activities, and Lesson 18: Colors for color matching exercises that pair well with rock sorting by color.
Disclosure: Some links on this page are affiliate links. As an Amazon Associate, MontessoriMom earns from qualifying purchases. This costs you nothing extra.